General Settings
On this page you can find settings that are either related to the registered company or to specific system modules.
Below, we go through the tabs located at the top of the page in detail and provide a comprehensive description of the
available features.
Organization Details
General Information
On this tab, you can edit the details of the registered company.
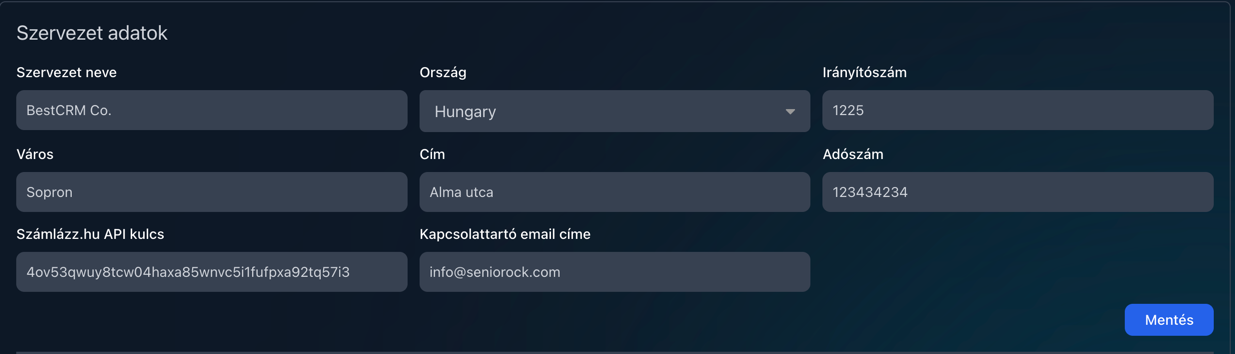
Most fields should be filled out logically, however we would like to highlight the "Számlázz.hu API key" field.
(You can read more about the Számlázz.hu API key here.)
By filling in this field, the following features become available in the application:
- Invoicing menu: the full invoicing module becomes available
- Invoicing from the customer page: a “Create invoice” button appears at the top of the customer page
- Attach invoice items to quotes: when creating a quote, invoice items can be added at the bottom of the page
Referral Code

Although the referral code is not strictly part of the organization data, it is still loosely related.
In our system, you can invite others, and both of you will receive the following benefits:
- The referrer receives a 10% discount from their monthly fee for each invited user who has been an active subscriber for at least 1 month.
- The invited user receives a one-time 10% discount on their monthly fee.
It is important to note that the referral code is refreshed periodically, so it is not recommended to save it.
For easier sharing/copying, clicking the icon at the end of the row will copy the code directly to your clipboard.
Delete Registration

By clicking the “Delete registration” button, you initiate the company deletion process.
All users with the “Owner” role must approve the deletion. Once everyone has approved, the company becomes inaccessible
after 14 days (you can cancel the deletion at any time during this period by clicking the “Cancel” button), and after 90
days it is permanently deleted.
During this 90-day period, you can request the reversal of the process via email.
Access Management
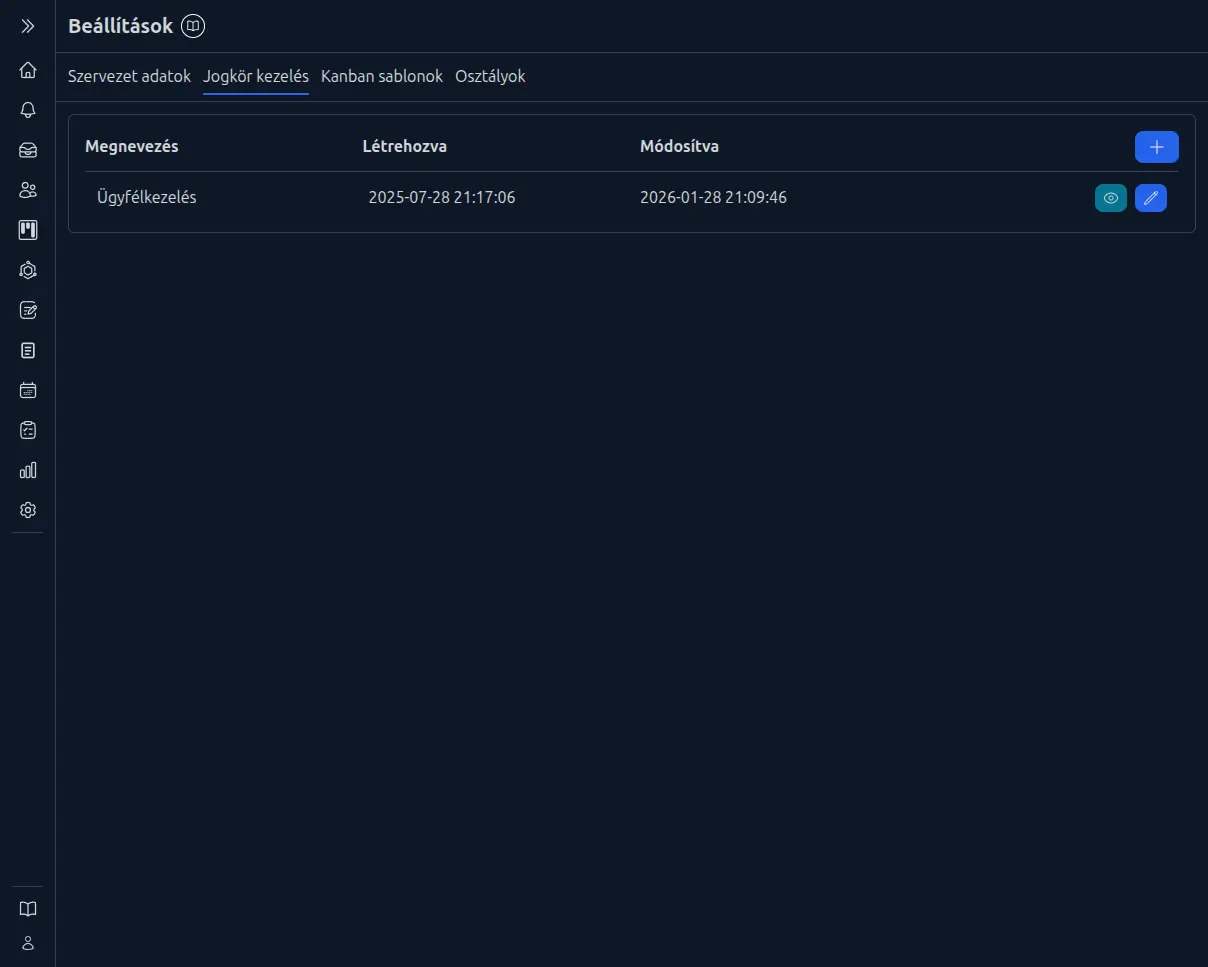
You can freely create access roles used within the system. As the first user, you have the "Owner" role, which is the highest permission level and grants access to everything. This role does not appear in the dropdown list and cannot be edited, but it can be assigned to others without limitation.
All other roles can be created freely. To create a new role, click the "+" icon at the end of the table header.
After creating a role and selecting it from the list, you will see the following screen. The permission list is
predefined and cannot be extended with custom items.
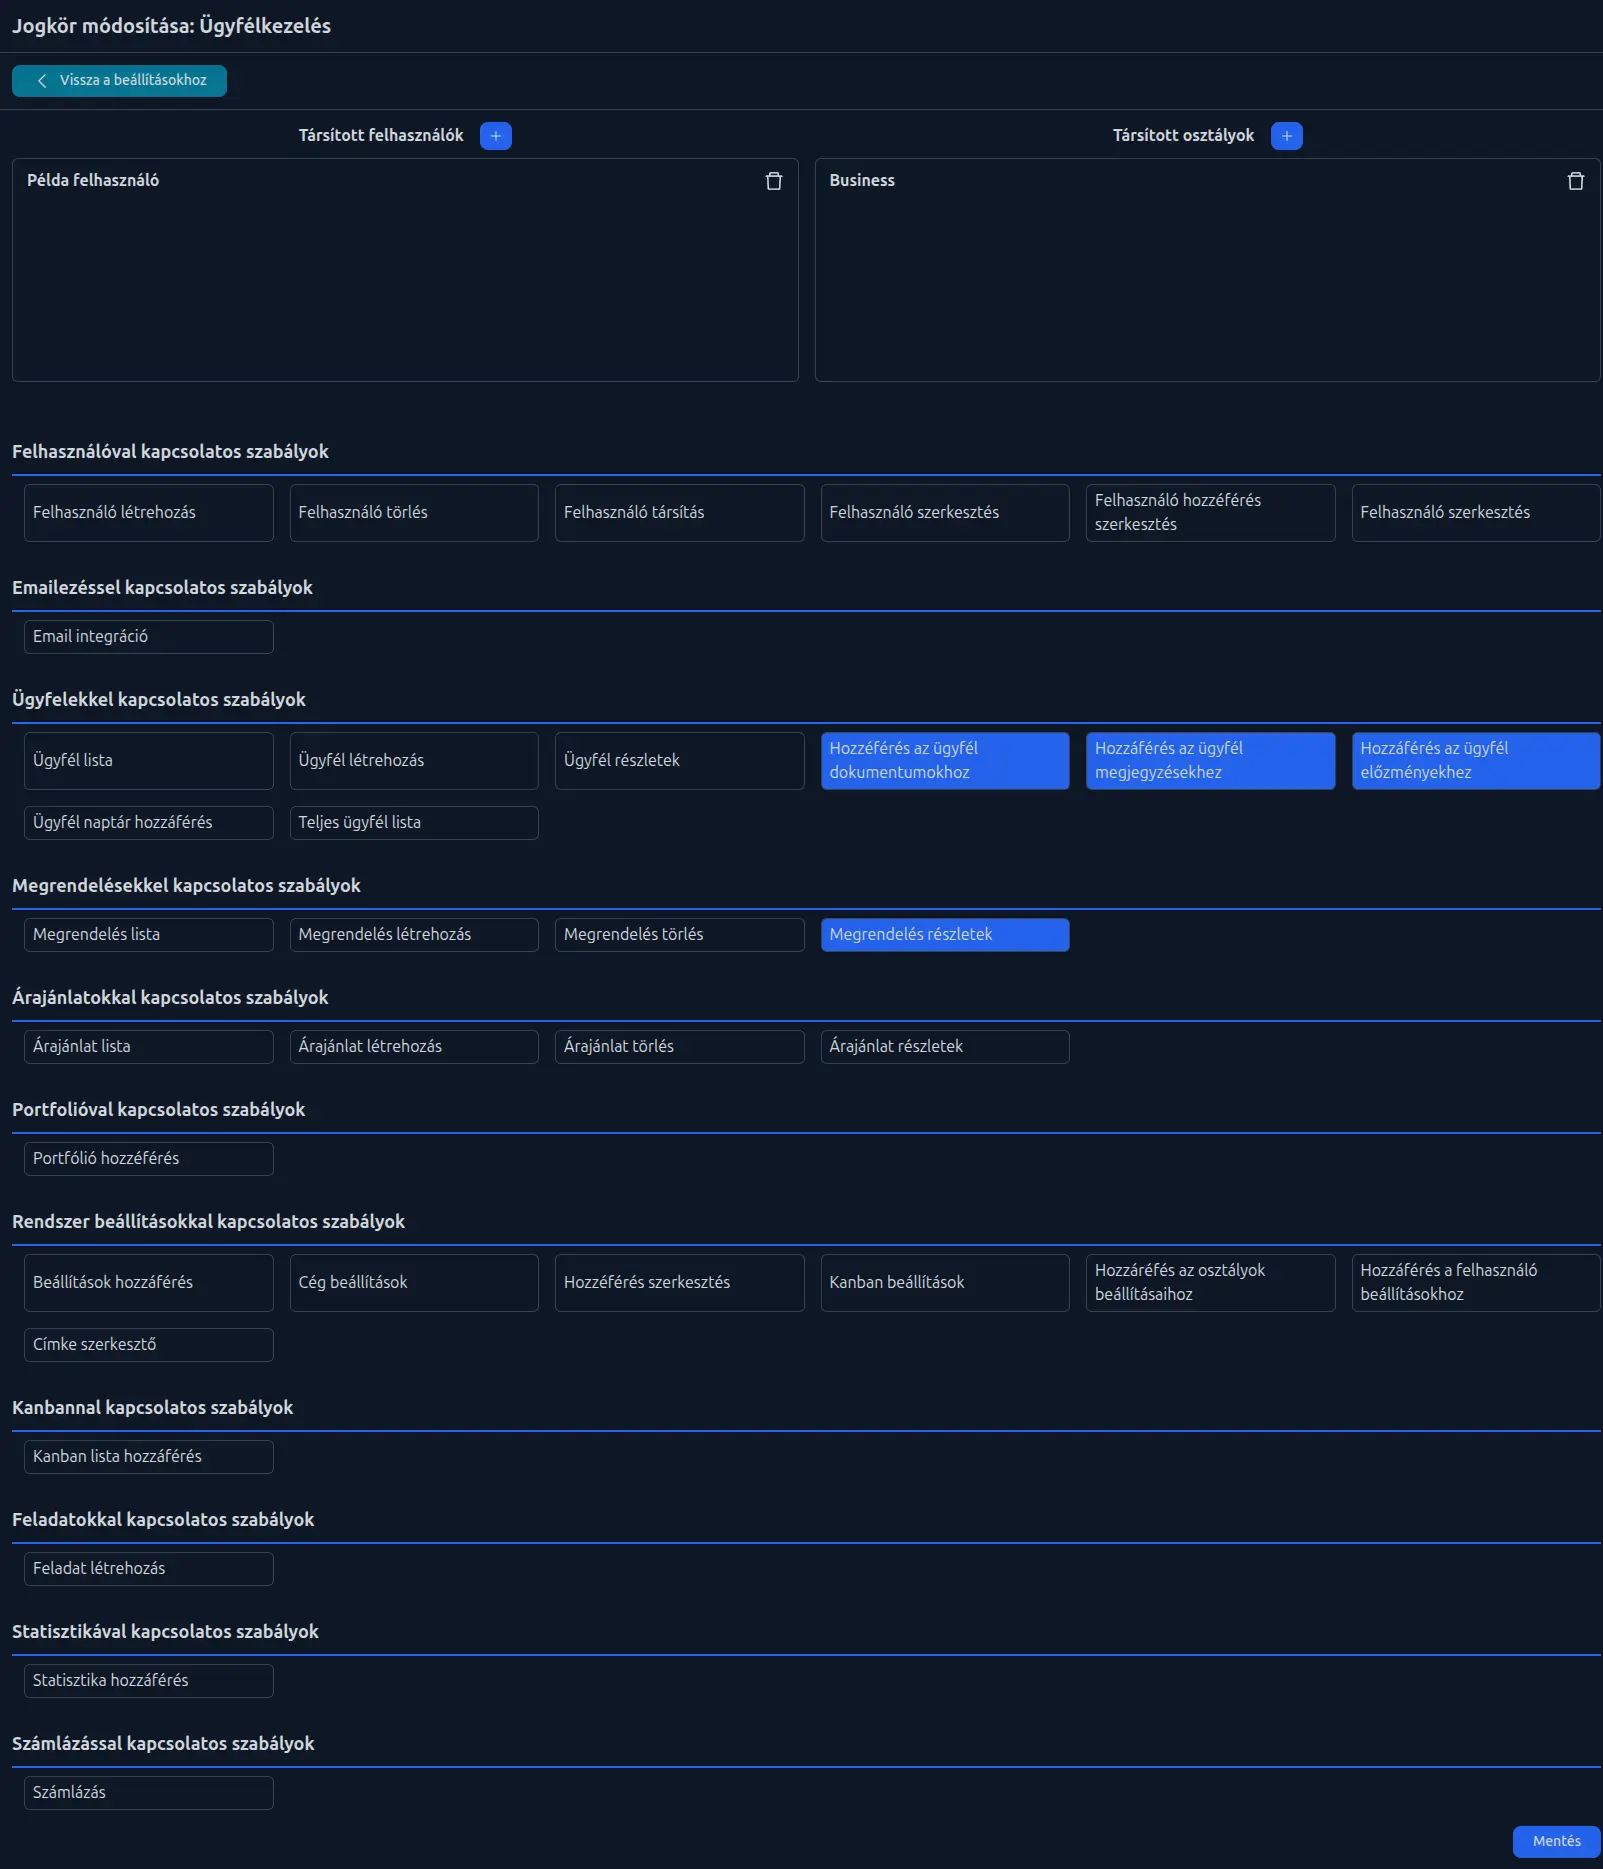
At the top of the page, you will see two blocks side by side: "Assigned users" and "Assigned departments". Both work the
same way. Clicking the "+" icon opens a modal where you can assign users or departments to the role.
To revoke a role, click the trash icon next to the listed user or department.
When modifying user or department role assignments, there is no need to click the "Save" button at the bottom—these changes are saved automatically.
You can easily assign permissions to a role by clicking on the permission you want to add (or remove), then clicking the "Save" button at the bottom.
Roles can be used in two places:
- assigned to a user
- or assigned to a department
These two options do not exclude each other—we will revisit this later in the "Departments" section.
Departments
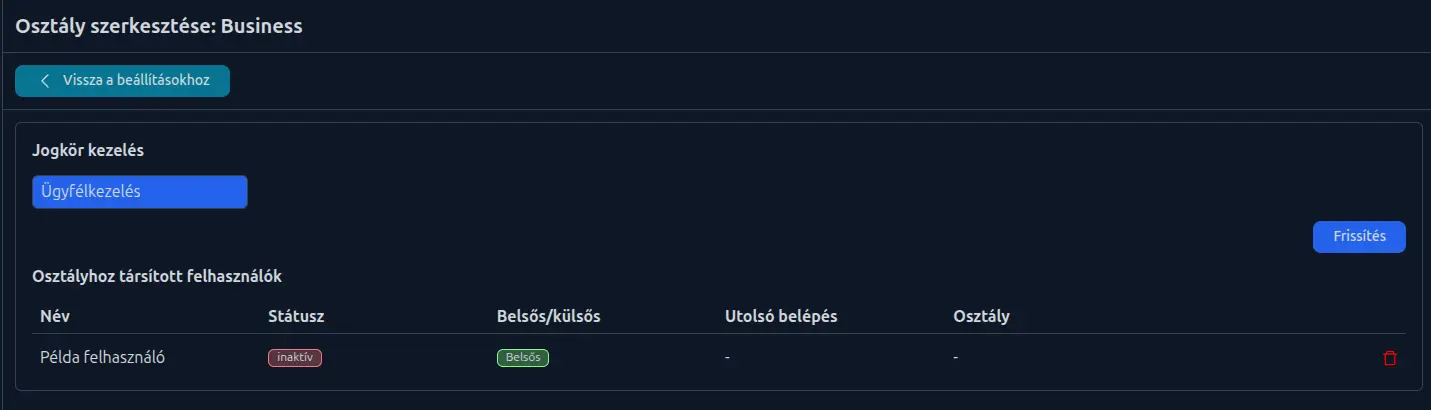
The list view of departments is identical to the access roles list view, so we won’t detail it again.
Departments can be thought of as groups of users—for example installers, salespeople, marketers, etc.
These departments can be assigned previously created roles, and all users within the department will inherit those
roles, eliminating the need to assign permissions individually.
If a user needs more permissions than those inherited from their department, this is still possible. Additional roles can be assigned on the user profile page under the "Access management" tab, or directly on the role details page (see "Access Management").
Roles can be assigned to departments in the same way permissions are assigned to roles: click on the role to add or remove it from the department. Don’t forget to click the "Update" button after making your selection.
Below the roles, you can see the list of users assigned to the department. You can remove a user from the department using the trash icon at the end of the row, or directly from the user’s profile page.