It is very important to emphasize that our system DOES NOT store any data during email integration. For every interaction, data is requested directly from the mail server; we do not work with previously stored data.
The mail module is available to all users and does not require any special permissions.
Currently, email accounts can only be integrated via SMTP/IMAP. You can read more about this on the profile page.
Google email integration is also in progress and is currently in the audit phase. Unfortunately, we cannot give an exact release date, as the completion of this process (specifically the audit) does not depend solely on us.
Microsoft Outlook integration is currently only planned for the future.
By clicking the button with the "@" icon, the login process starts. If the credentials were configured correctly on the profile page, your incoming emails will appear after a few seconds.
This integration is useful because it provides the following additional features:
- creating clients based on emails
- creating quotations or orders based on emails
- sending files directly from CoreCRM (orders, quotations, invoices, or any other uploaded files)
- and, of course, eliminating the need for a separate email client, as you can read and write emails directly from CoreCRM
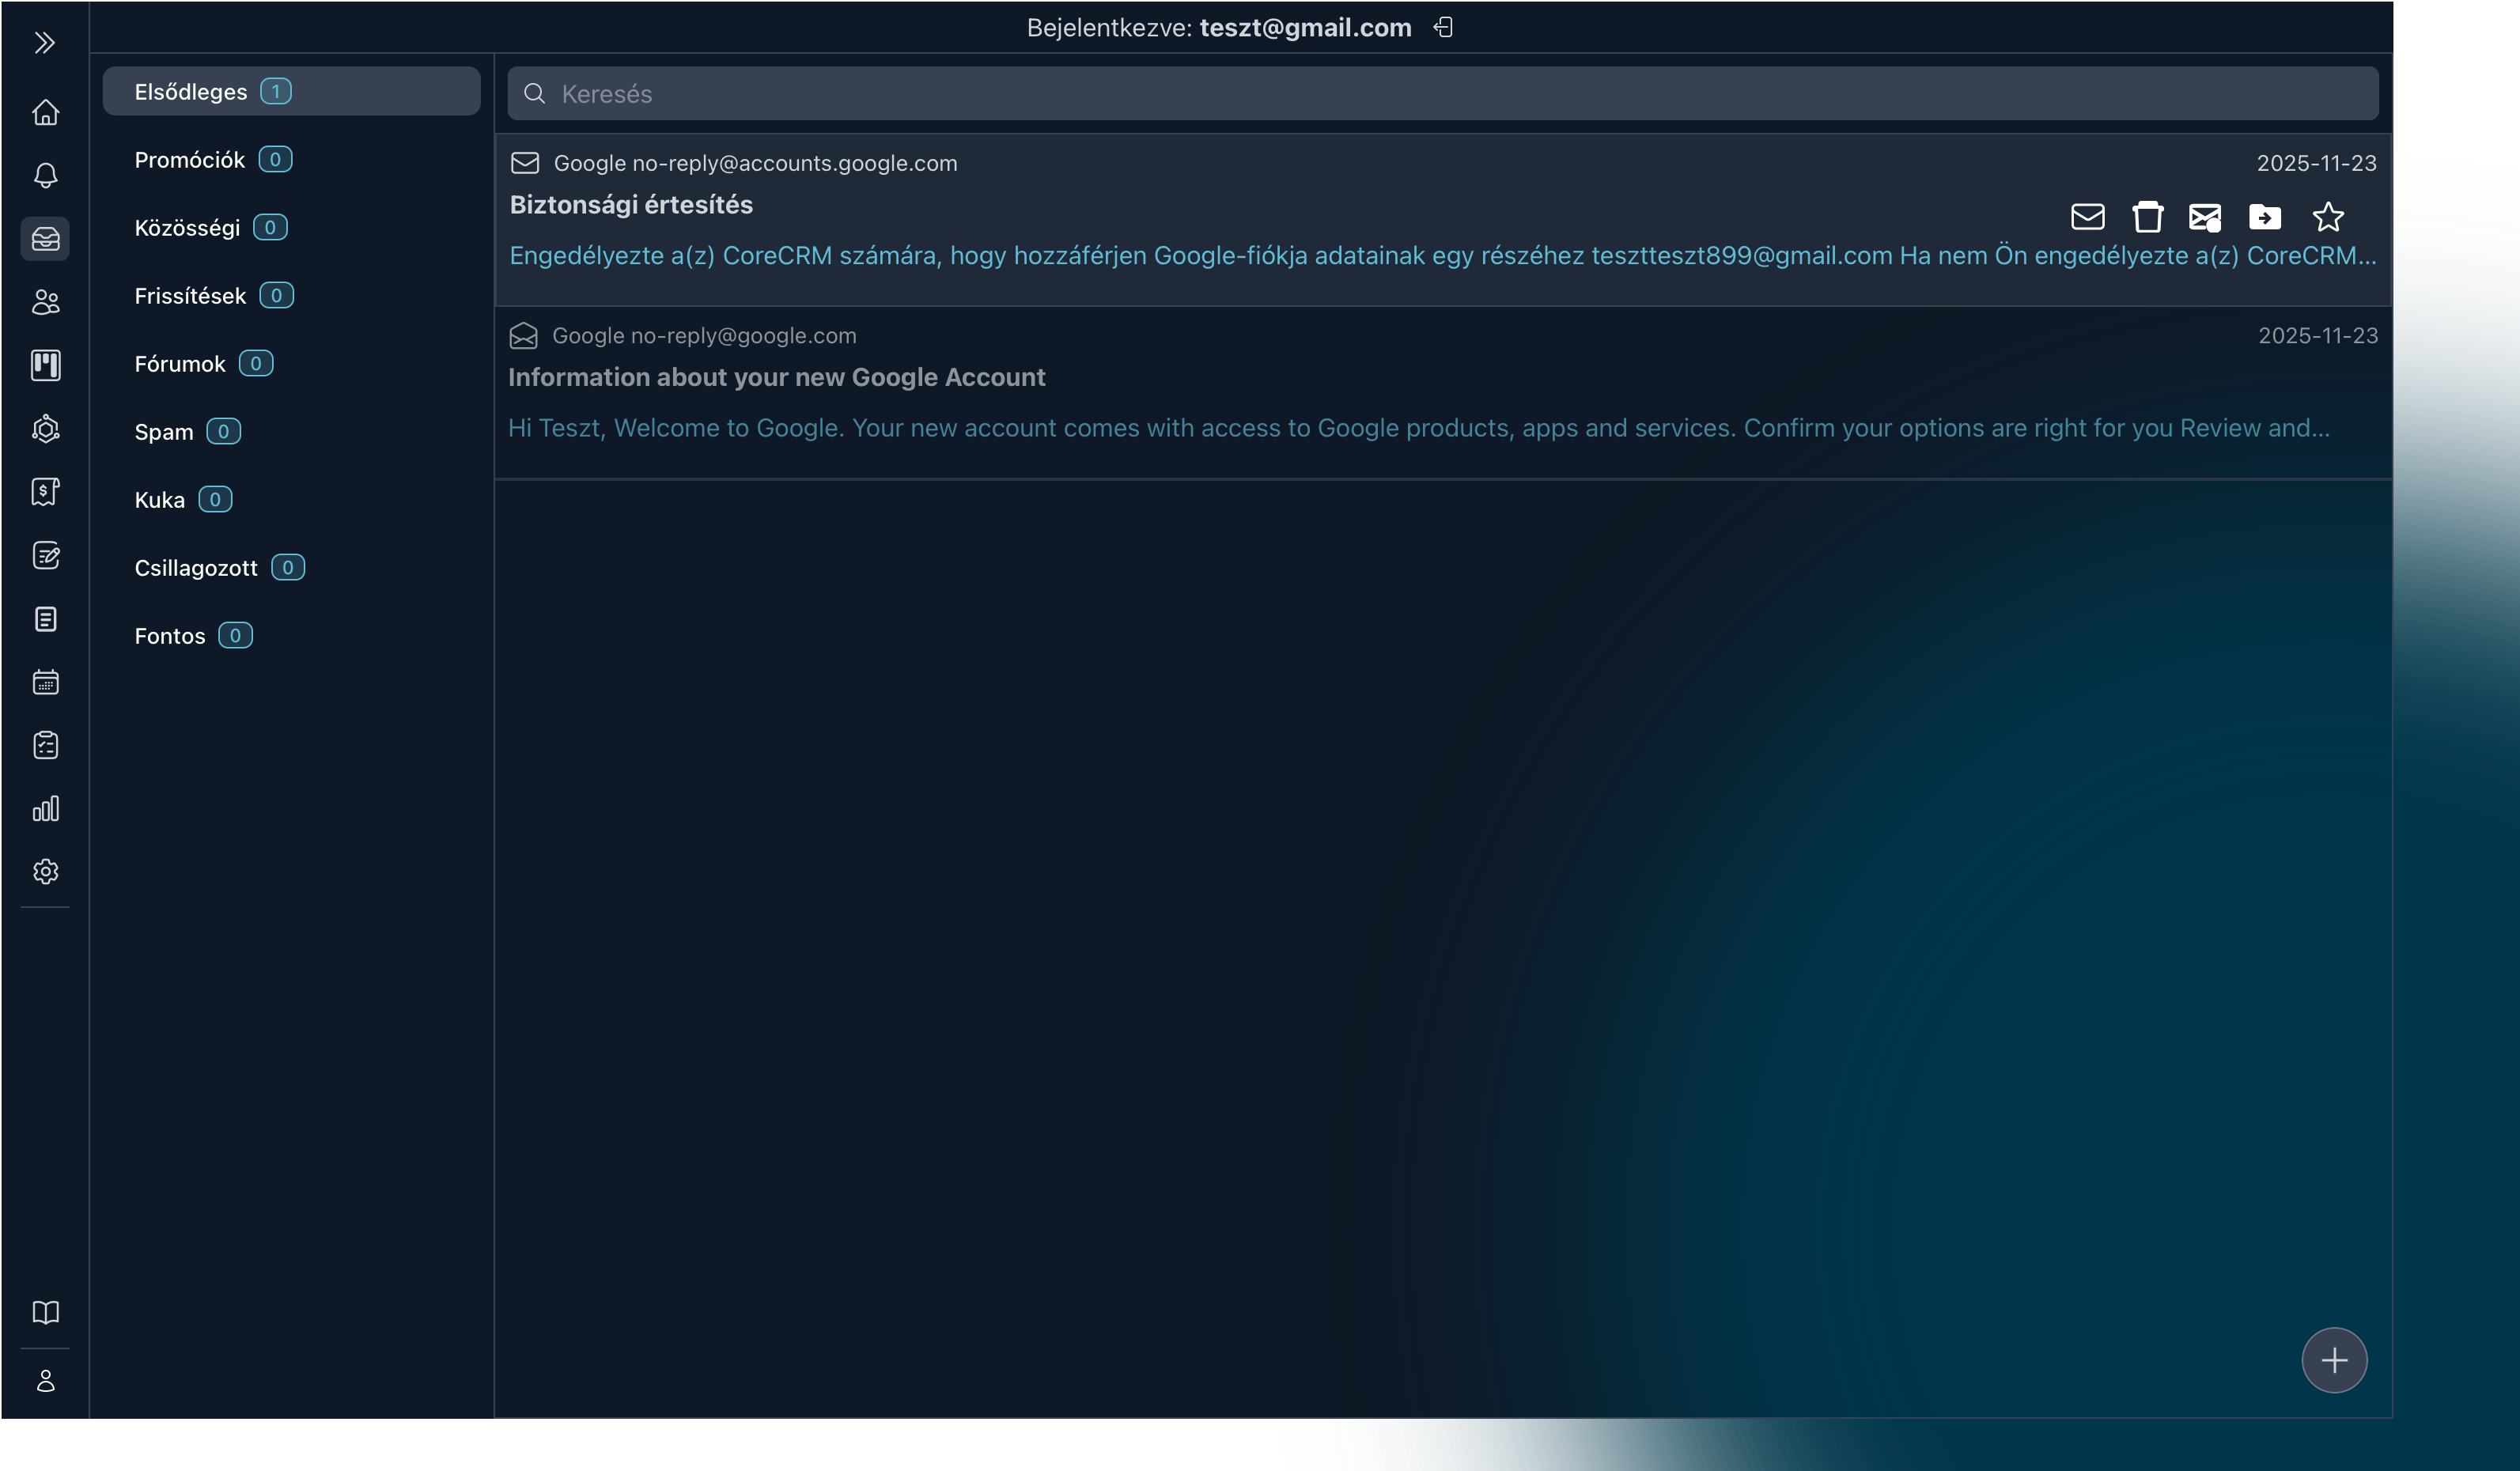
As shown in the image above, after logging in, not only the emails from the connected account are displayed, but also the created folders.
You can search among emails using the search field above the email list.
If you are not using a mobile device, hovering over an email row will display a quick-action menu. From here, you can move the email to another folder, delete it (move it to trash), permanently delete it, mark it as a favorite, or mark it as read.
By clicking on an email, the email list is replaced by the reading pane. Here you can view the email content and access additional functions.
Above the email, you’ll see the following menu bar:

The left side of the top bar contains the same functions as the quick-action menu described above.
On the right side, the following actions are available in order: Reply, Reply all, Forward, and Close — standard email actions.
In the second row, you’ll find two icons:
- create a quotation based on the email
- create a client based on the email
Below that, you’ll see some basic information about the email (sender, date, and subject), followed by the email body.
Composing an Email
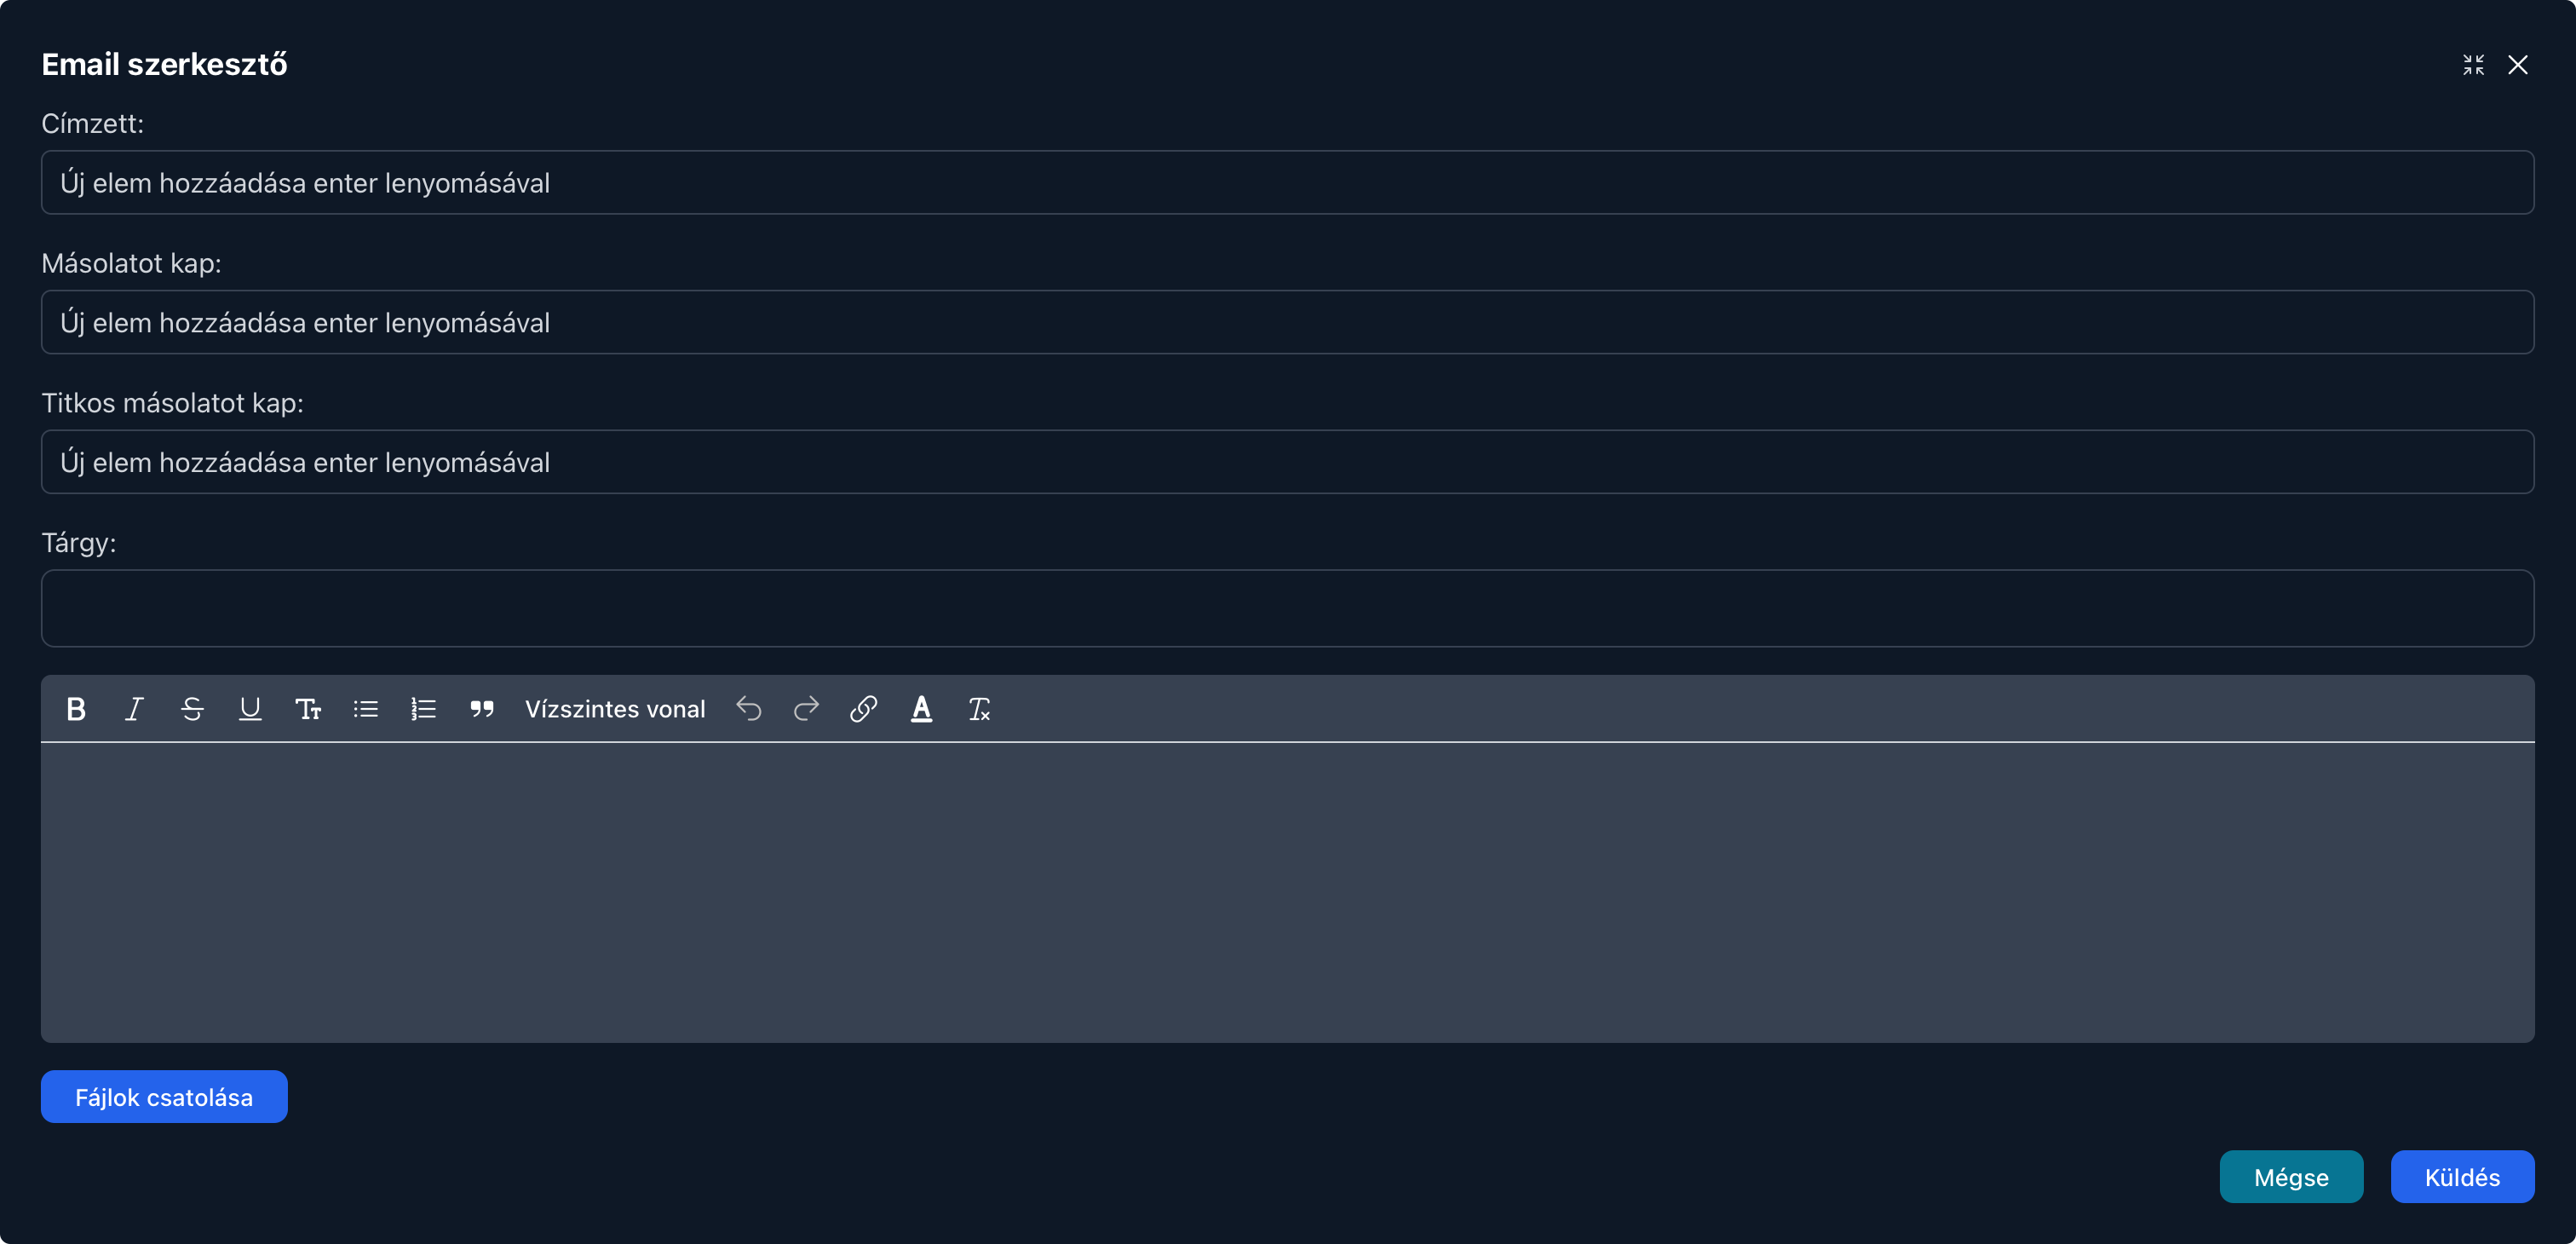
To compose a new email, click the button with the "+" icon in the bottom-right corner of the screen.
The same rules apply here as in any other email client: you need to provide the recipient, subject, and message body. Everything else is optional.