Clients

When opening the Clients menu (which requires specific permissions), you will see the list of clients already added to the system.
Since a large amount of information can accumulate for each client as you use the application, not all data can be displayed in the table — therefore, only the most important details appear here.
Above the table, you will find the filter bar.
You can filter clients by several criteria, such as the user they are assigned to, their tags, creation date, whether they are a private individual, and you can also search by name.
You can create a new client by clicking the "+" icon in the top-right corner of the table.
Clicking on any row will take you to the client's detailed view.
After clicking the "+" icon, you can either add a new client manually or use the import function if you want to create several clients at once.
Creation

When creating a client, you can enter many different types of information.
For easier explanation, we group the fields into three categories — the same categories that appear on the interface.
Basic Information
Here you can enter the client's name, the contact person's name and email address, phone number, mobile number, tax number, and whether the client is a private individual.
Address Information
In this section, you can provide the client's primary address.
However, since additional addresses are often needed, you may also enter separate installation, billing, and mailing addresses if necessary.
Additional Information
Here you can assign tags (more about tags here), assign users to the client, and specify whether the client is a subcontractor.
Details
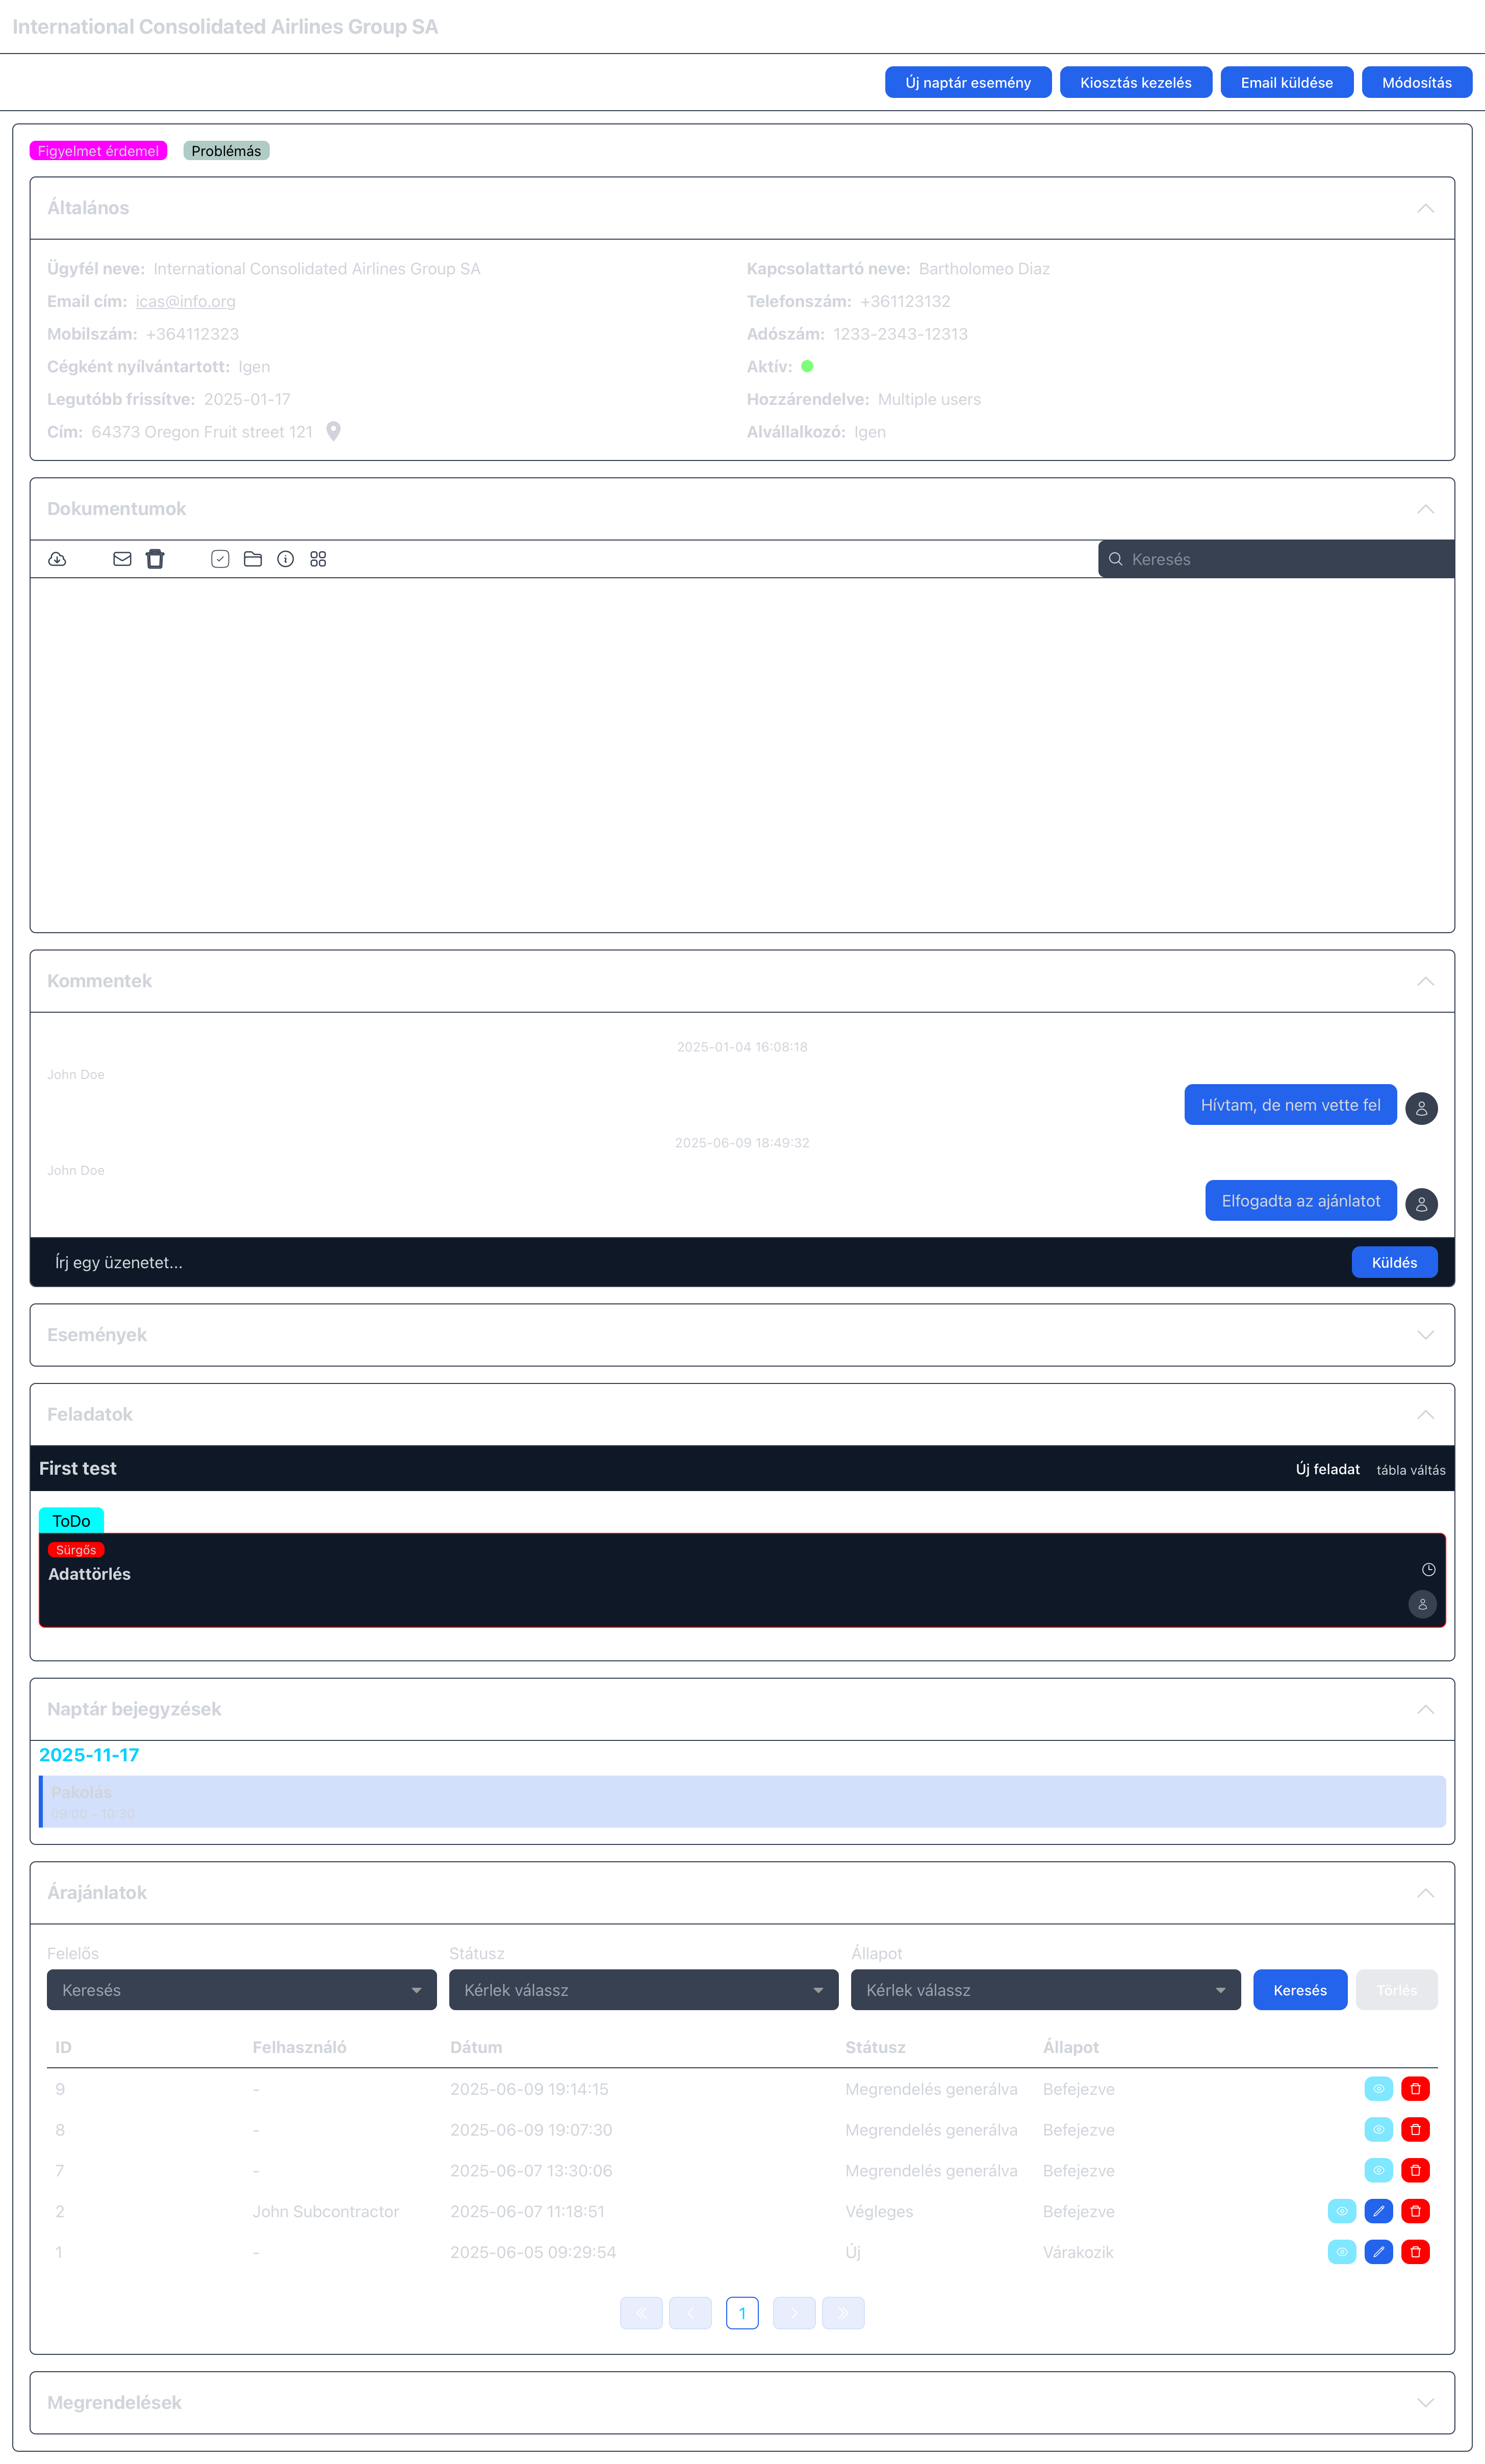
The client details page shows everything that has been linked to the client across the system — including orders, quotations, invoices, and calendar events.
From this page, you can also perform client-specific actions, such as sending an email directly (if you are logged in — more details here), or creating a calendar entry.
These functions are available through the action buttons at the top of the page.
You can also modify user assignments or update the client’s tags.
When the page loads, the blocks representing the different modules are collapsed for better clarity, but you can expand any of them at any time.
We won’t describe each block in detail, since all modules have their own dedicated documentation.
However, it is important to highlight that each block only displays data related specifically to the selected client.
Finally, for users who frequently navigate to client locations:
All addresses displayed on this page are clickable links.
Clicking an address opens a Google Maps link with the location automatically pre-filled for navigation.
Import
You can import your existing clients, so you don’t have to create them one by one. To do this, simply click the New
Client button and select the Import option.
The import process uses a CSV file and consists of 3 steps.
Step 1: Select CSV file
In the first step of the import process, you need to select the file from your phone/tablet/computer storage that you
want to use.
Important: make sure to select a comma-separated CSV file.

If the CSV structure is valid, the process will automatically proceed to the next step.
Step 2: Data mapping
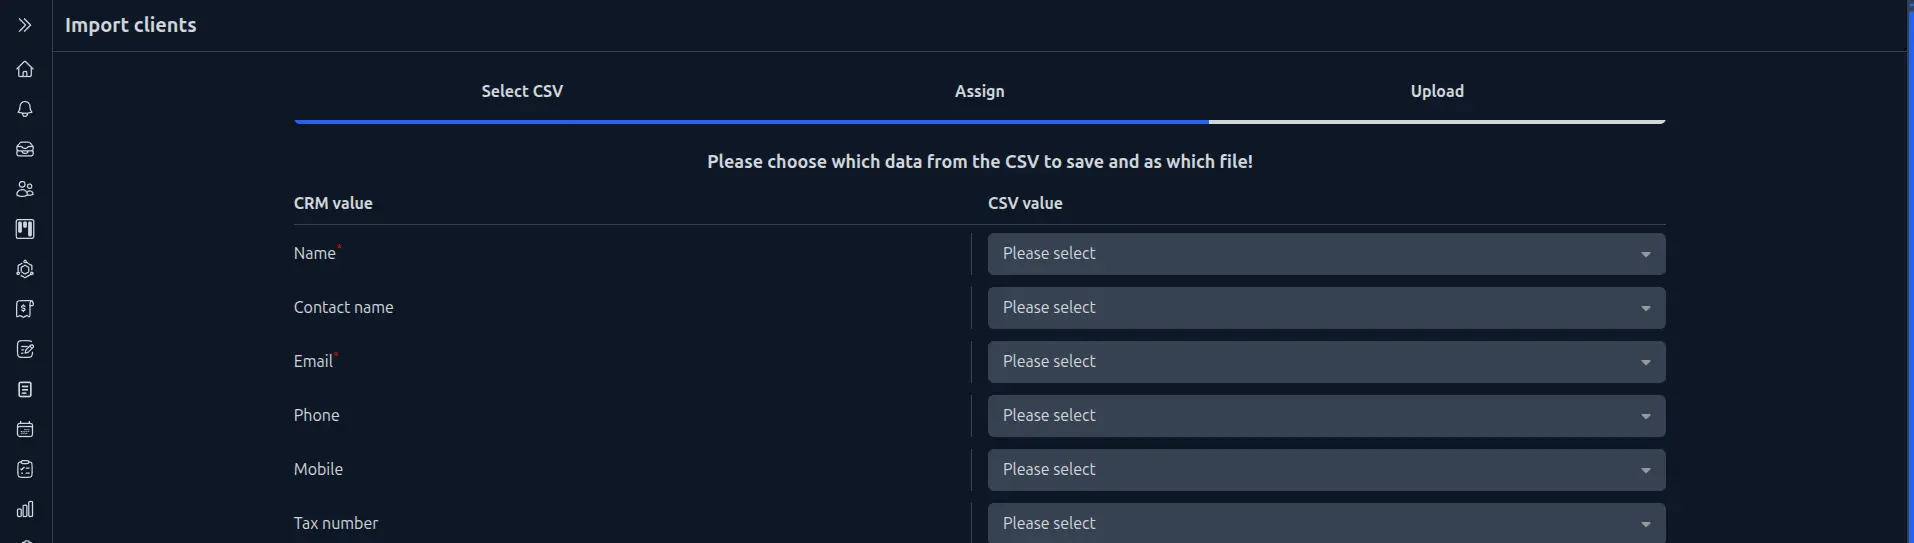
In the second step, you need to match the columns from the selected CSV file to the corresponding CRM fields. Fields marked with an asterisk (*) are required; otherwise, the data validation will fail.
The import algorithm will attempt to convert mismatched data types where possible, but in some cases, you may need to correct them manually.
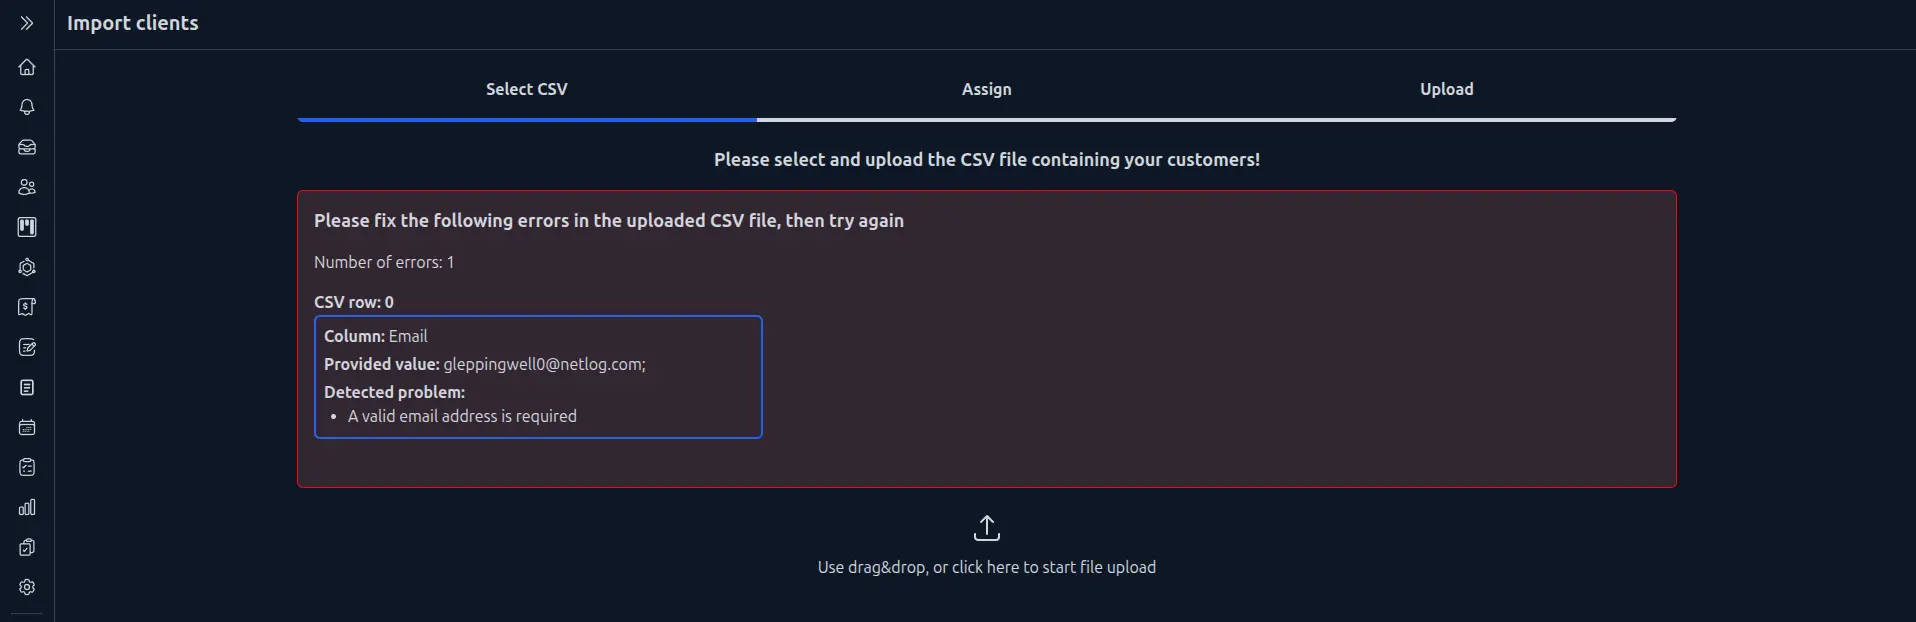
Below you can see an example of what happens when trying to import a dataset that contains at least one mismatched data type.
It is not required to map every column—any unmapped values will simply be ignored.
Step 3: Upload
If all data is correct, after processing the file, the system will return you to the client list page. This may not happen immediately and depends on the size of the CSV file.
If the system detects any errors, it will return you to the first step so you can correct them and restart the process. A list of detected errors will be generated, and once all are fixed, the client list can be successfully imported.
In the example below, the email address is invalid because it ends with a semicolon.