Kanban
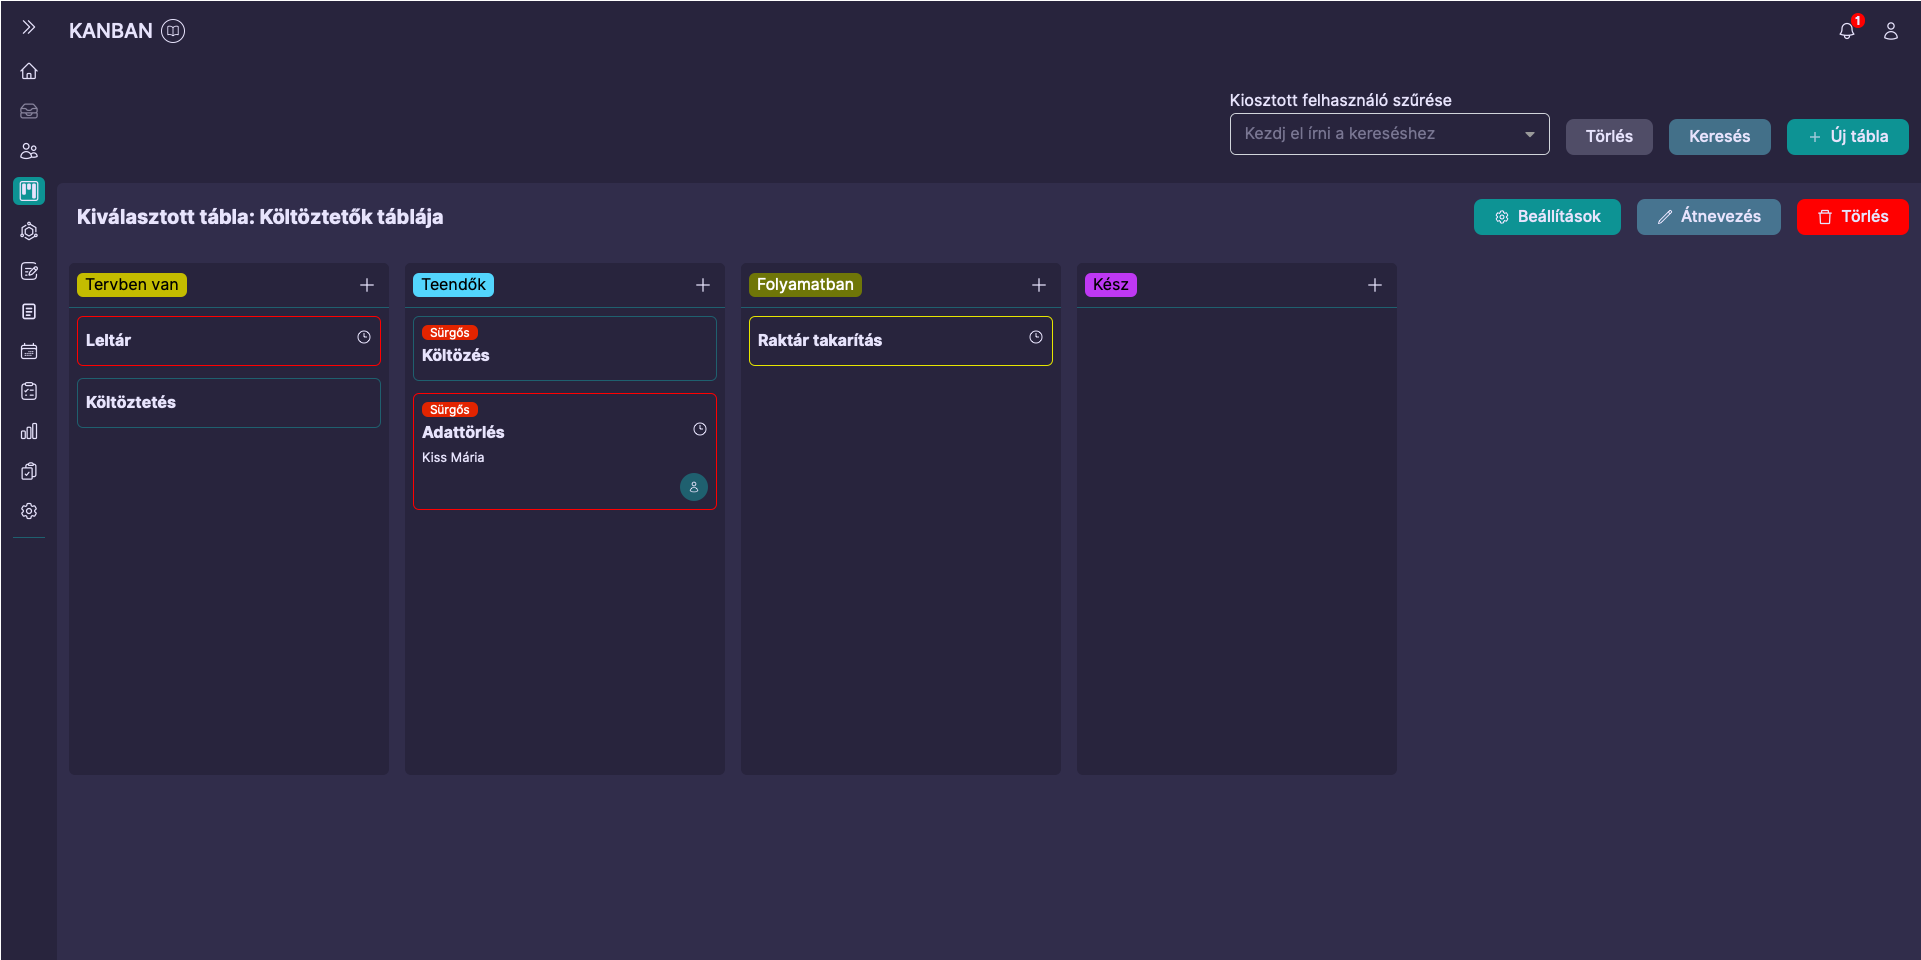
When opening the Kanban menu, the page shown above will appear if:
- a Kanban board has been created,
- a board has been assigned to you.
So, what exactly are we seeing in the image above?
We can see the columns added in the settings, containing the tasks that have been created and moved between them.
Let's start by looking at the tasks.
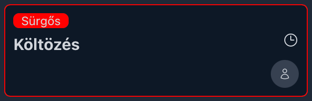
You may notice that some tasks have a red border. This is because these tasks have deadlines, which you can also tell from the clock icon displayed on the card. If you are viewing the interface on a laptop or desktop computer, hovering over the icon will also show you the deadline.
However, tasks with deadlines do not immediately get a red border. There is a specific rule system for this. The border of tasks with deadlines can have 3 different colors:
- red: the deadline is within 5 days
- yellow: the deadline is between 5 and 10 days away
- white: more than 10 days remain until the deadline
You may also see a row of labels above the task title (if any labels have been added). In the example, you can see the "Urgent" label.
Another important element is the profile icon displayed on the card. This indicates that the task has already been assigned to someone. If you are viewing the interface on a laptop or desktop computer, hovering over the icon will show you who is responsible for the task.
Details
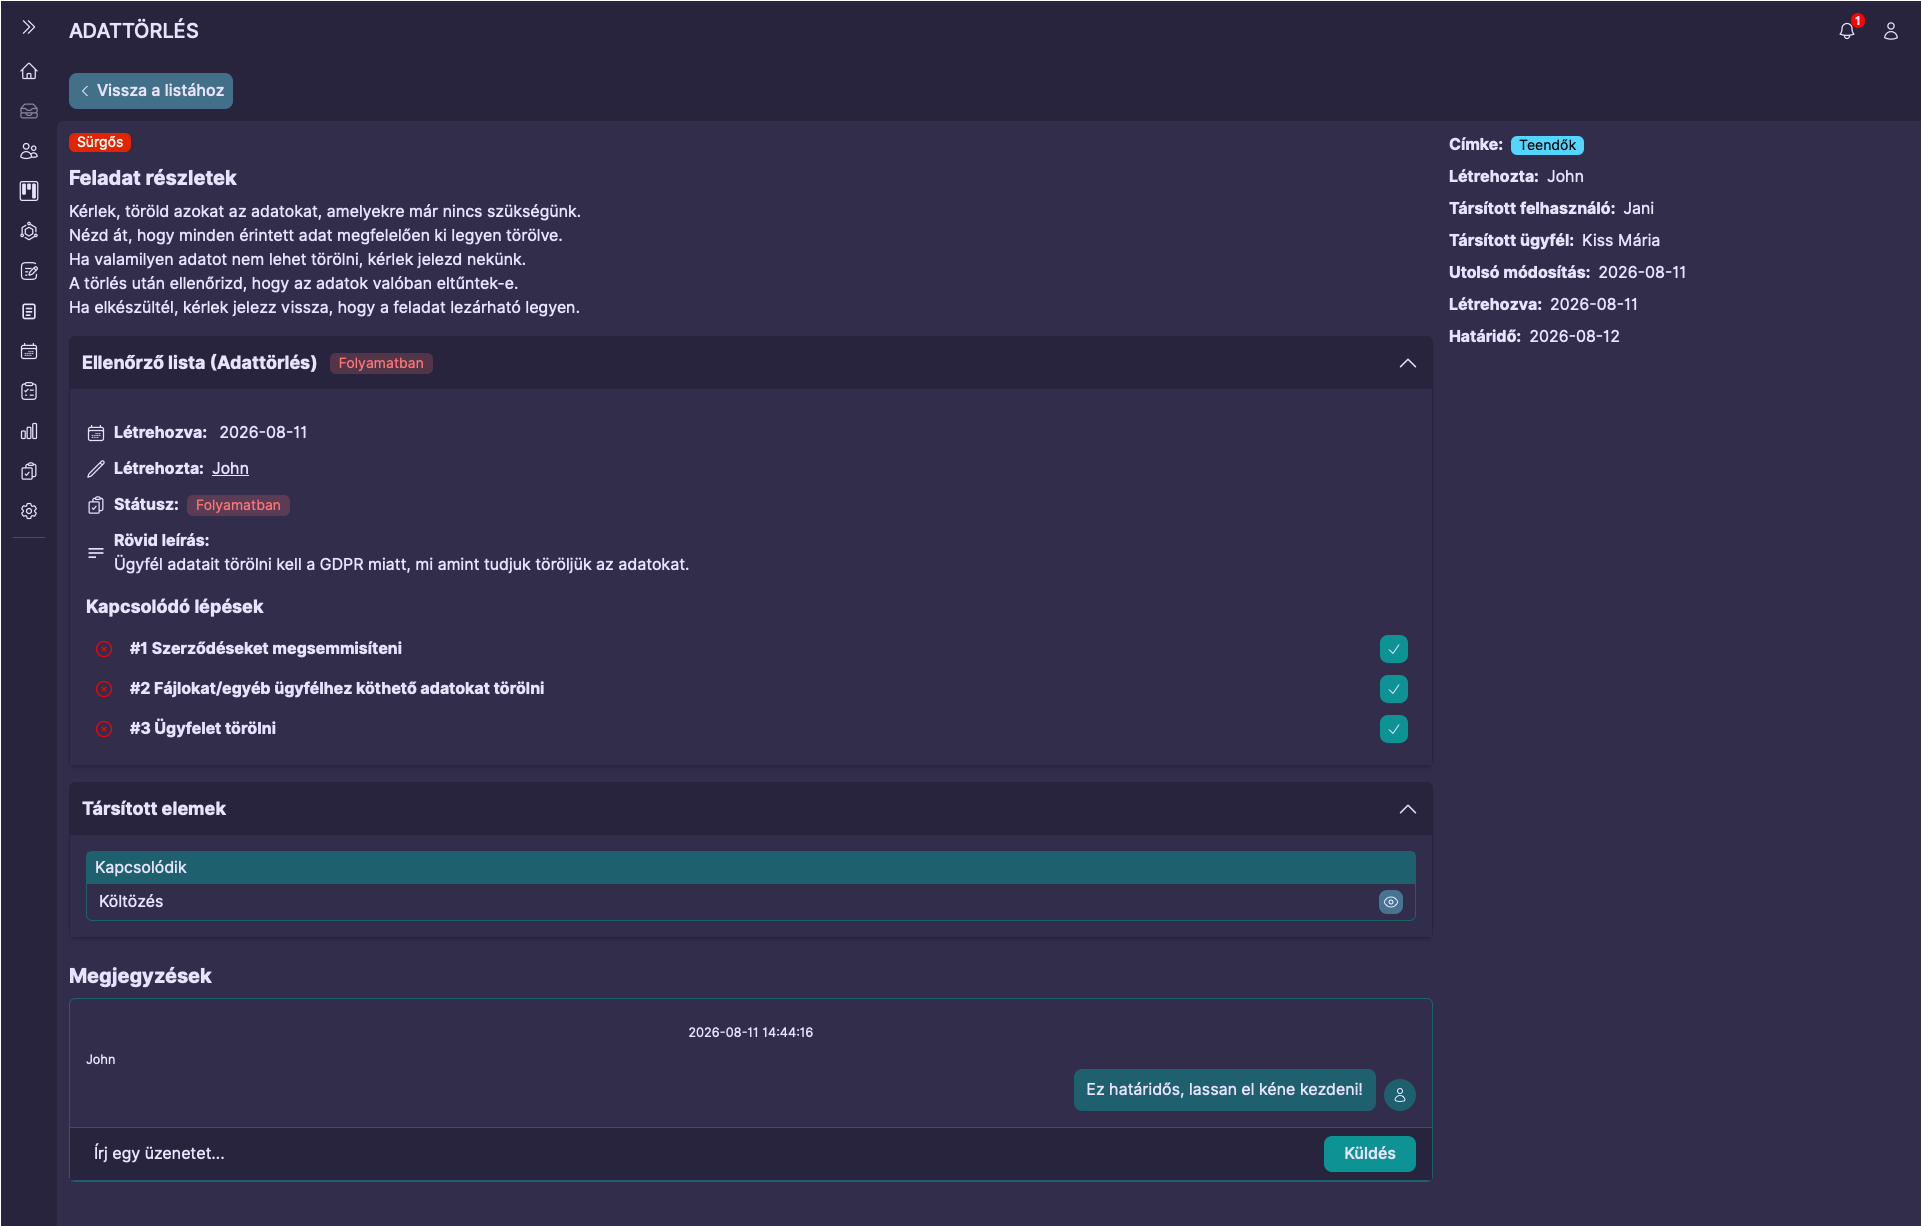
When you click on a task in the list, a popup window opens where you can see the details of the task. At the bottom of the window, you will find a button labeled "Open in new window". Clicking this button opens the task details in a new window.
On this page, you can see which labels have been added to the task, who created it, who it has been assigned to, which client has been assigned to the task (if any), when it was last modified, when it was created, and what the deadline is, if one has been set. If there are any associated tasks, they will also be displayed. Checklists work in the same way.
In addition to these, the task title and description are also displayed.
At the bottom of the page, you can add comments to the task.
Creating and Editing
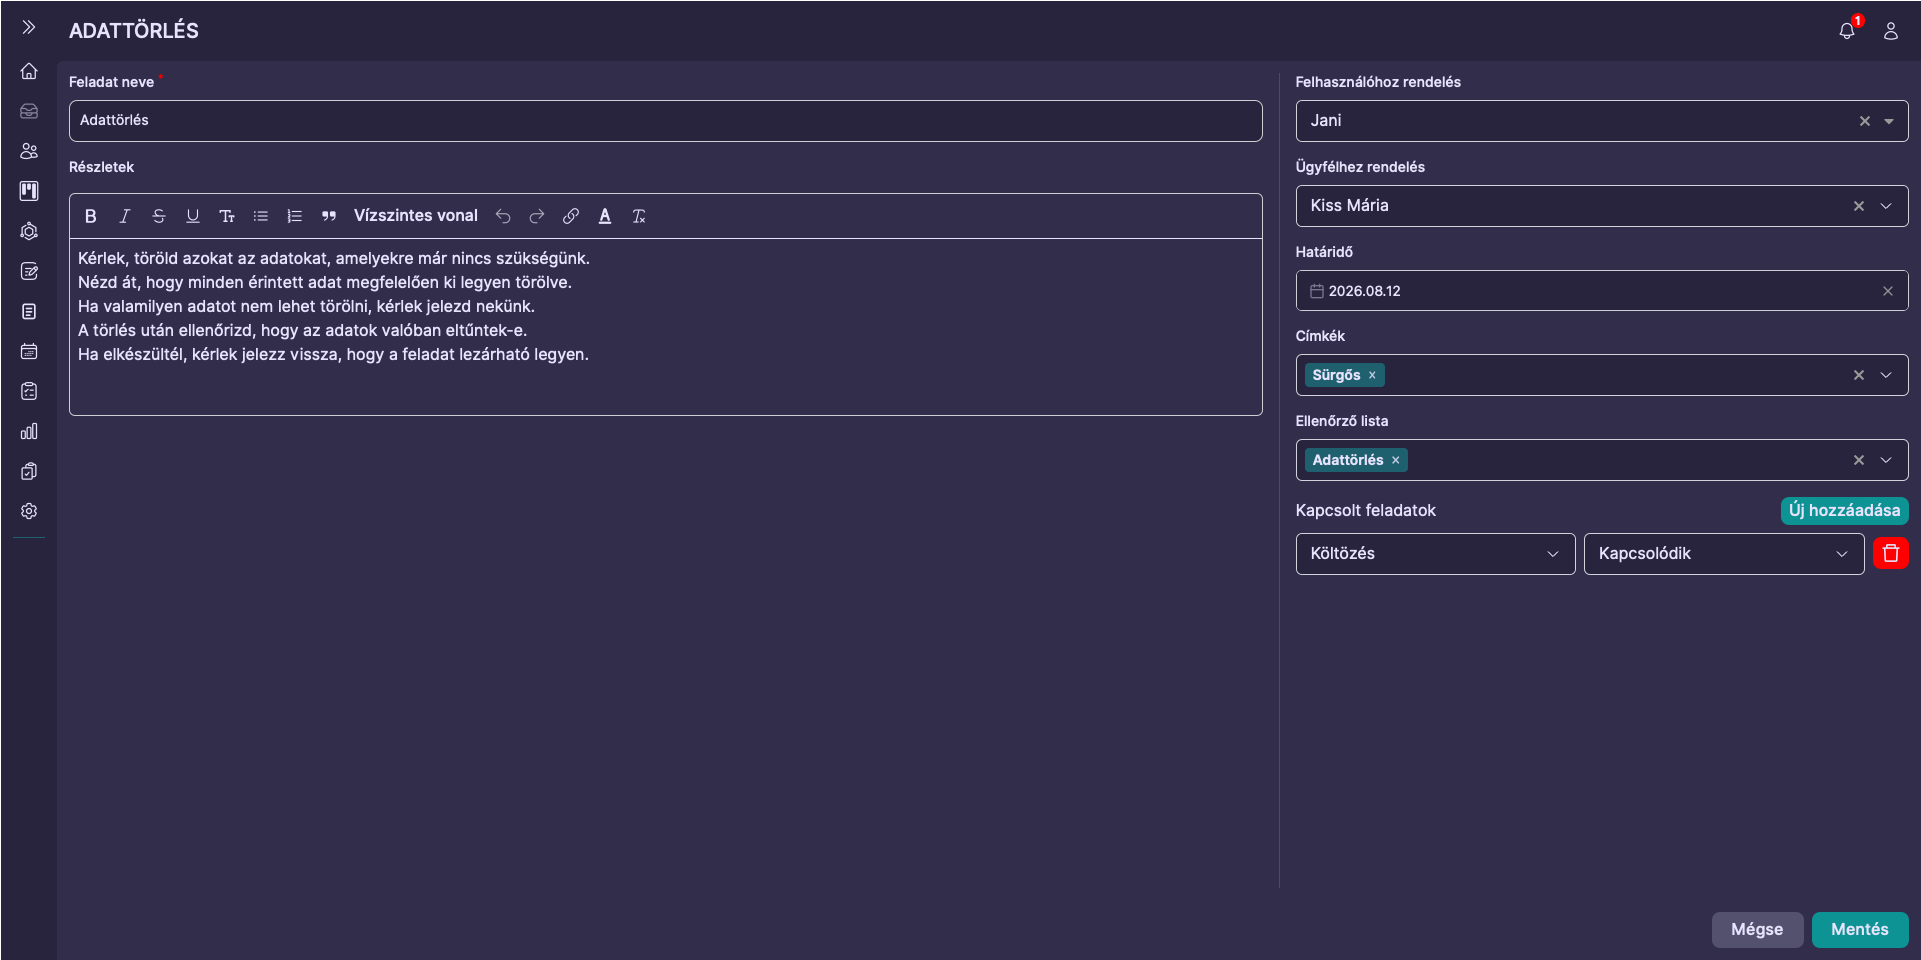
To create a task, click the plus icon in the top-right corner of the relevant column in the list view. This will open the editor window shown above.
Here you can enter the information described on the details page.
To edit a task, hover over it in the list and click the pencil icon that appears.
Switching Between Boards
You can create multiple boards, and multiple boards can also be assigned to a single user.
In this case, the user can switch between the available boards. A button labeled "Switch board" will appear in the top-right corner of the page. Clicking it will display the following:
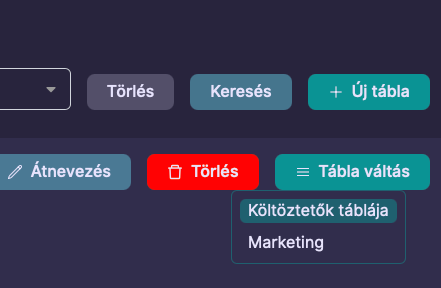
Here, the user can switch to the desired board by clicking on its name.
Creating/Editing a New Board
Access to this page is permission-based, so not everyone can access it. You can read more about this here.
In the top-right corner, you will find a button labeled "New board". Clicking it will prompt you to enter the name of the new board. After clicking the "Save" button, the browser will navigate to the page shown below:
You will also reach this page by clicking the "Settings" button.
As you can see in the image, this is where you can specify who can see the board, which columns it contains, and which labels are available for the board.
You can also change the order of the columns belonging to the board. To do this, click and hold the column header, then drag the column to the desired position.