Automation
Unlike the other menu items, the "Automation" menu does not contain elements related to your business. Instead, you can have entities created automatically (e.g. orders, quotes, notifications, etc.) based on predefined criteria and events. We have tried to include as much as possible in this feature, but due to the size and nature of the system, this menu may be expanded with even more elements in the future.
There are many things that can be created automatically, with a large amount of data that can be provided and many different ways to configure the criteria. Therefore, although we are trying to share as much information as possible here, due to the size of the module, we cannot cover every possible scenario.
Homepage
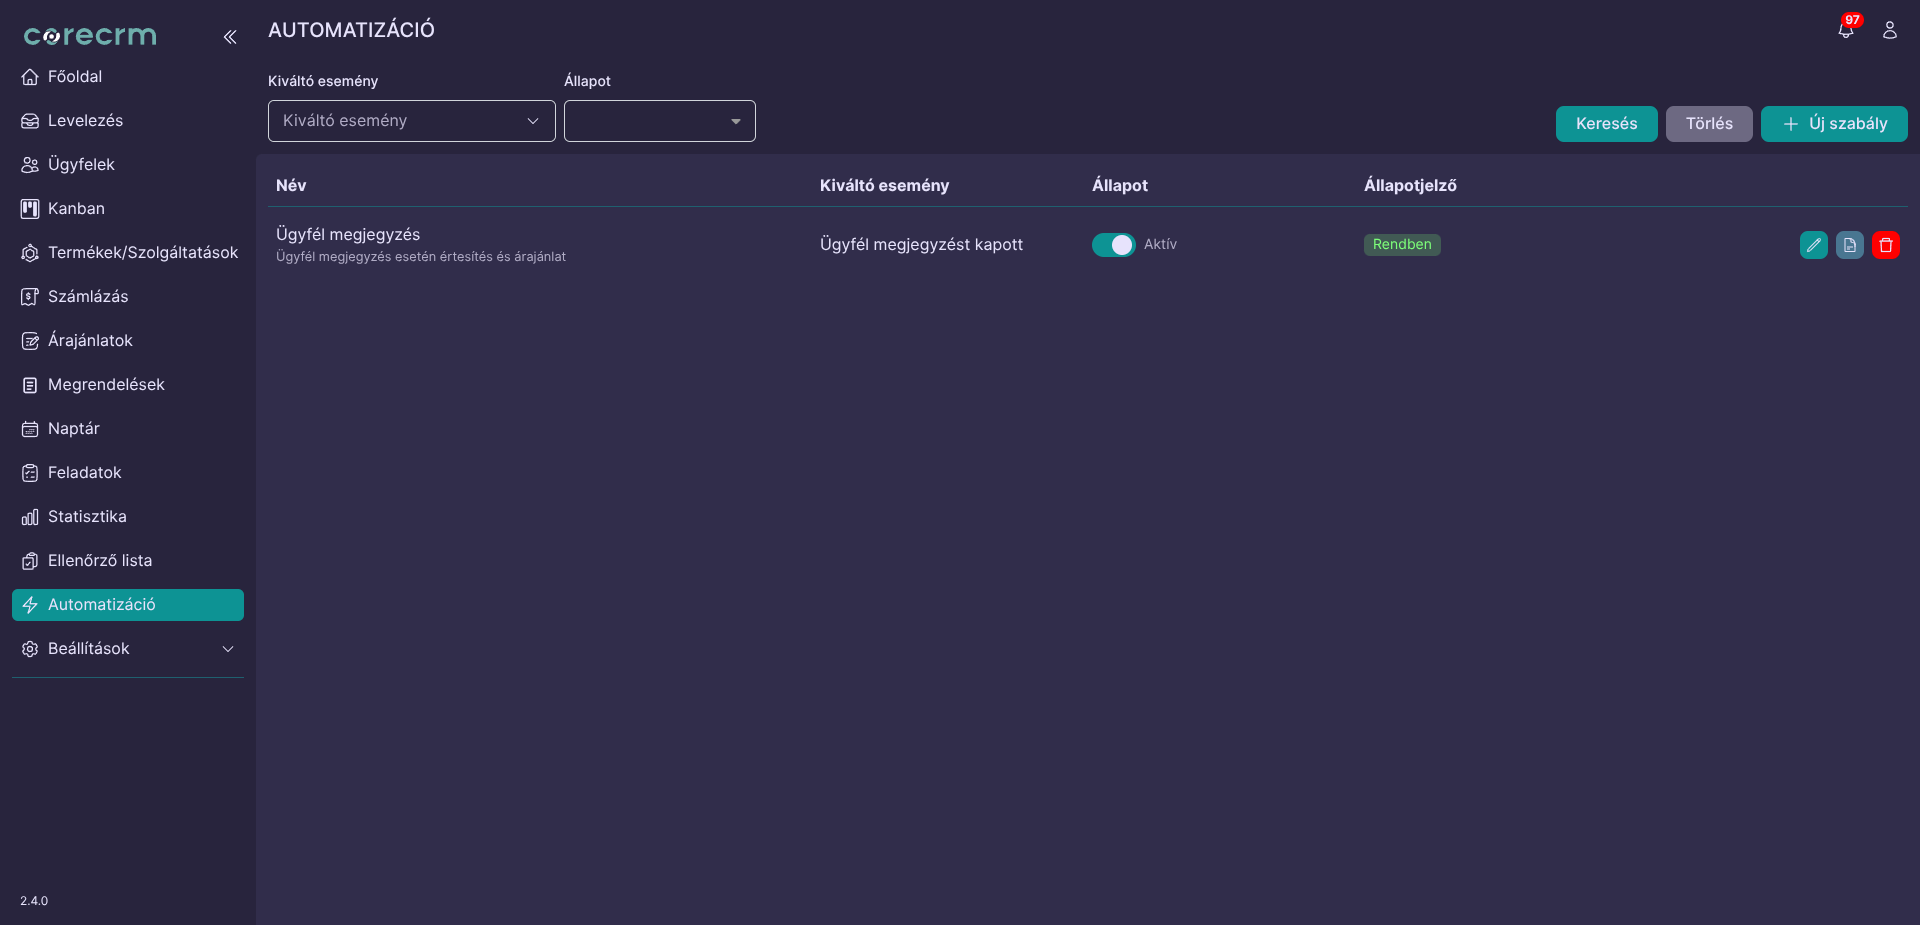
When opening the menu, the page shown above is displayed.
As with the other parts of the system, at the top of the page we find a filter ("Trigger event", "Status"), and on the right side the "+ New rule" button, which allows us to add a new element.
Below the bar, we find a table listing our existing elements. Here we can see which elements are active and whether there are any issues with a particular element. By clicking on a row, we can open the element's editing page, or choose from the three buttons at the end of the row, in the following order: edit, view logs, delete.
Editing/Creating
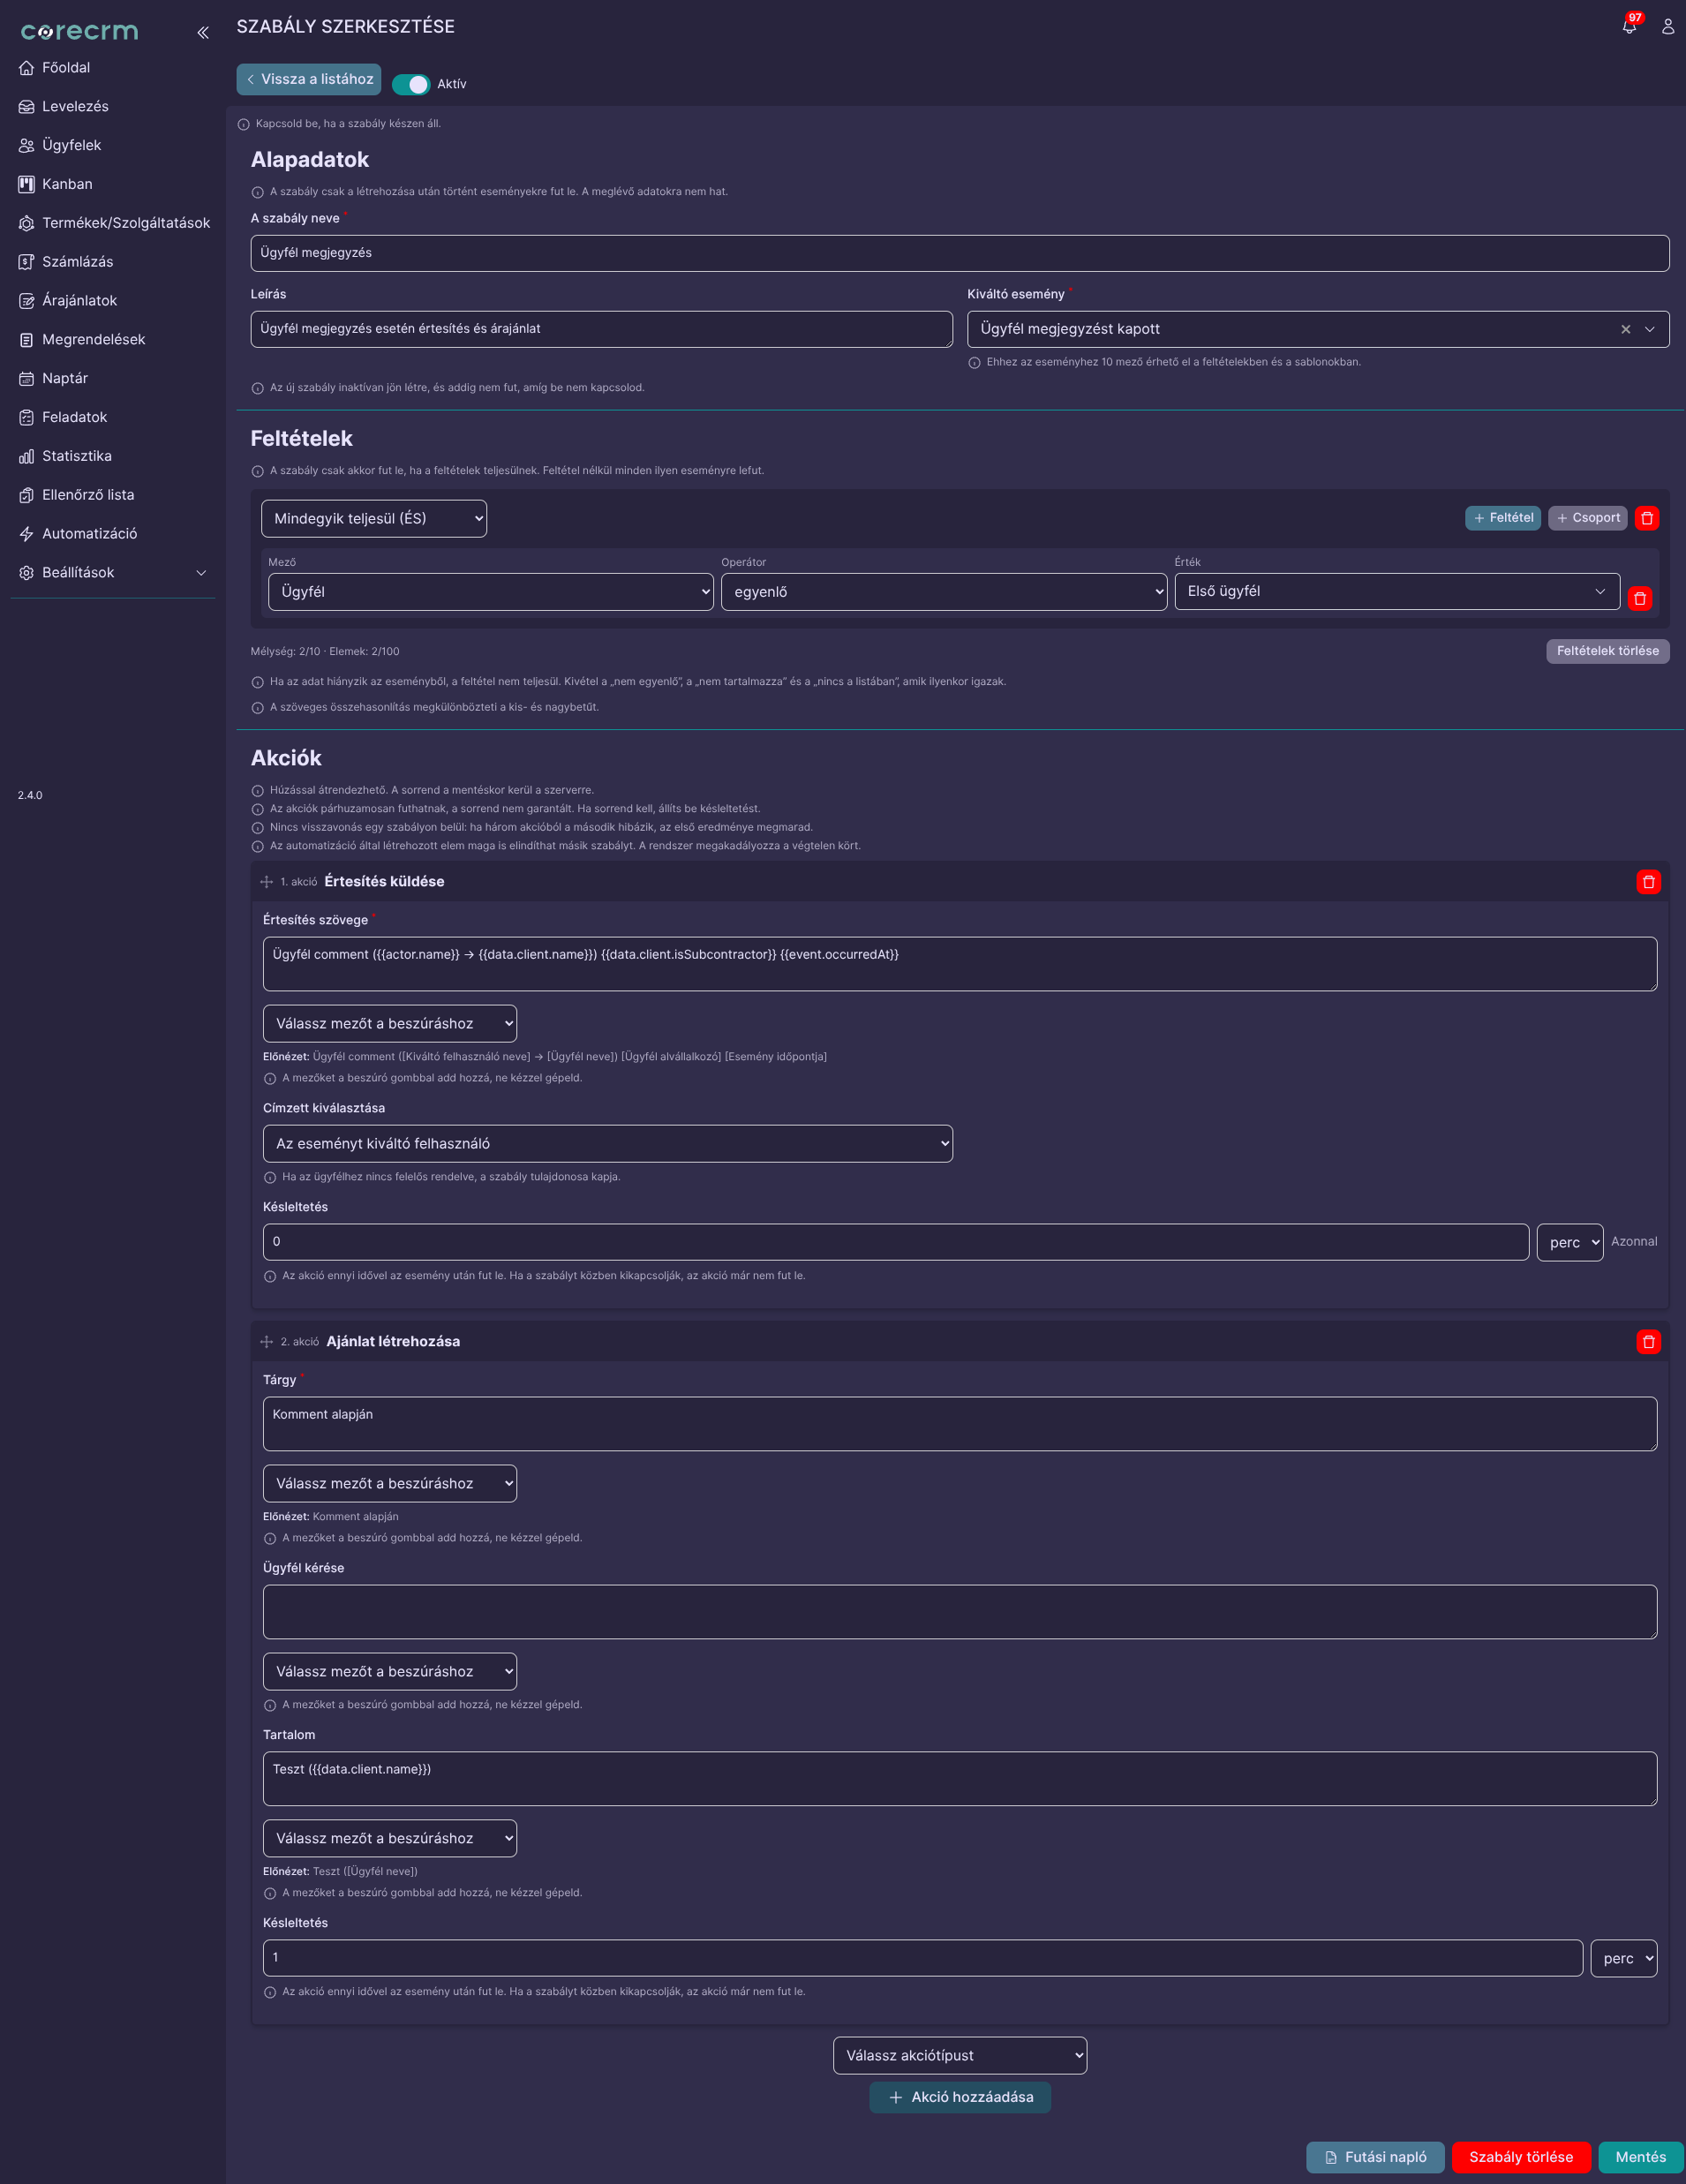
The editor page looks the same whether we are creating a new element or editing an existing one.
The page can essentially be divided into 3 sections: "Basic data", "Conditions", and "Actions". We will go through these 3 blocks below.
Basic data

In this block, we can specify the name of the element, add a note to it (it is useful to describe what the automation does here, because the note is also displayed in the list on the homepage, making it easier to identify the element), and configure what triggers the automatically created or edited element to start.
We can choose from the following list:
- Calendar event created
- Checklist completed
- Checklist created
- Checklist step checked
- Client assigned to a group
- Client received a note
- New client created
- Client deactivated
- Client received a tag
- Client modified
- User assigned to client
- Kanban task assigned to a responsible user
- Kanban task moved to another column
- New Kanban task created
- New order created
- Order phase changed
- New quote created
- Quote phase changed
- Task received a note
- Task completed
- New task created
This can be imagined as follows: if, for example, we select "Client received a note" from the dropdown list and later configure a calendar event to be created at that moment with the client and the user who added the note, then as soon as someone adds a note to the client, a calendar event will immediately be created and associated with that user and client.
We can associate different numbers of conditions and actions with the trigger events listed above. Below the input field, the system always indicates how many of each type can be associated with the currently selected value.
Conditions
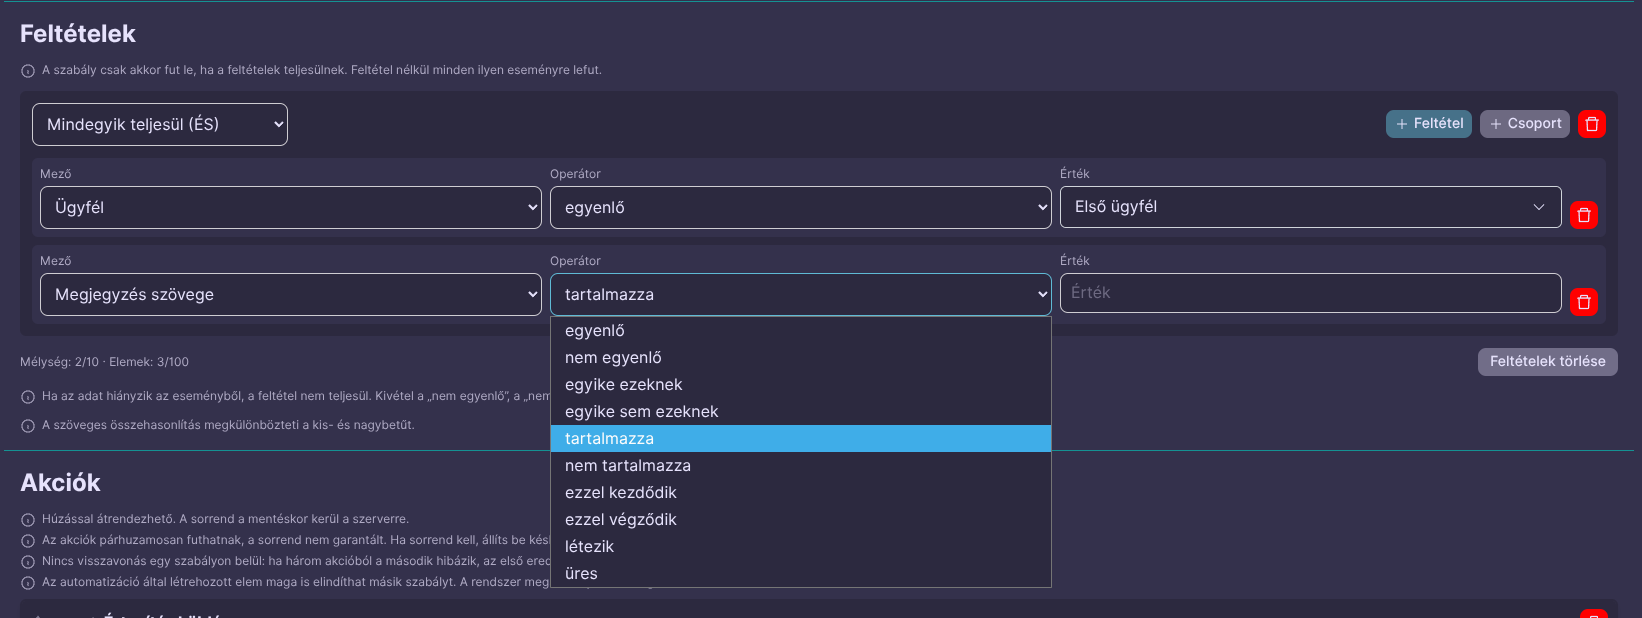
In the "Conditions" block, we can define conditions. We can create conditions with multiple levels of nesting and configure whether all conditions must be met, or whether, for example, only one of 4 conditions needs to be met. We can even define conditions in such a way that conditions that are not met are considered valid.
Adding a condition is not mandatory, as there may be cases where we want to create an automated process that should always run.
In the first input field, we specify what the given condition will be based on. Following the example we started above, we will now define the condition that the automated process should only run if the "First Client" receives a note.
In the second input field, we specify what the basis of the condition should be equal to (or, as shown in the example with the note, whether it contains a specific piece of text).
In the third input field, we specify the value that makes the condition valid. In this case, the client receiving the note must be the "First Client".
Actions
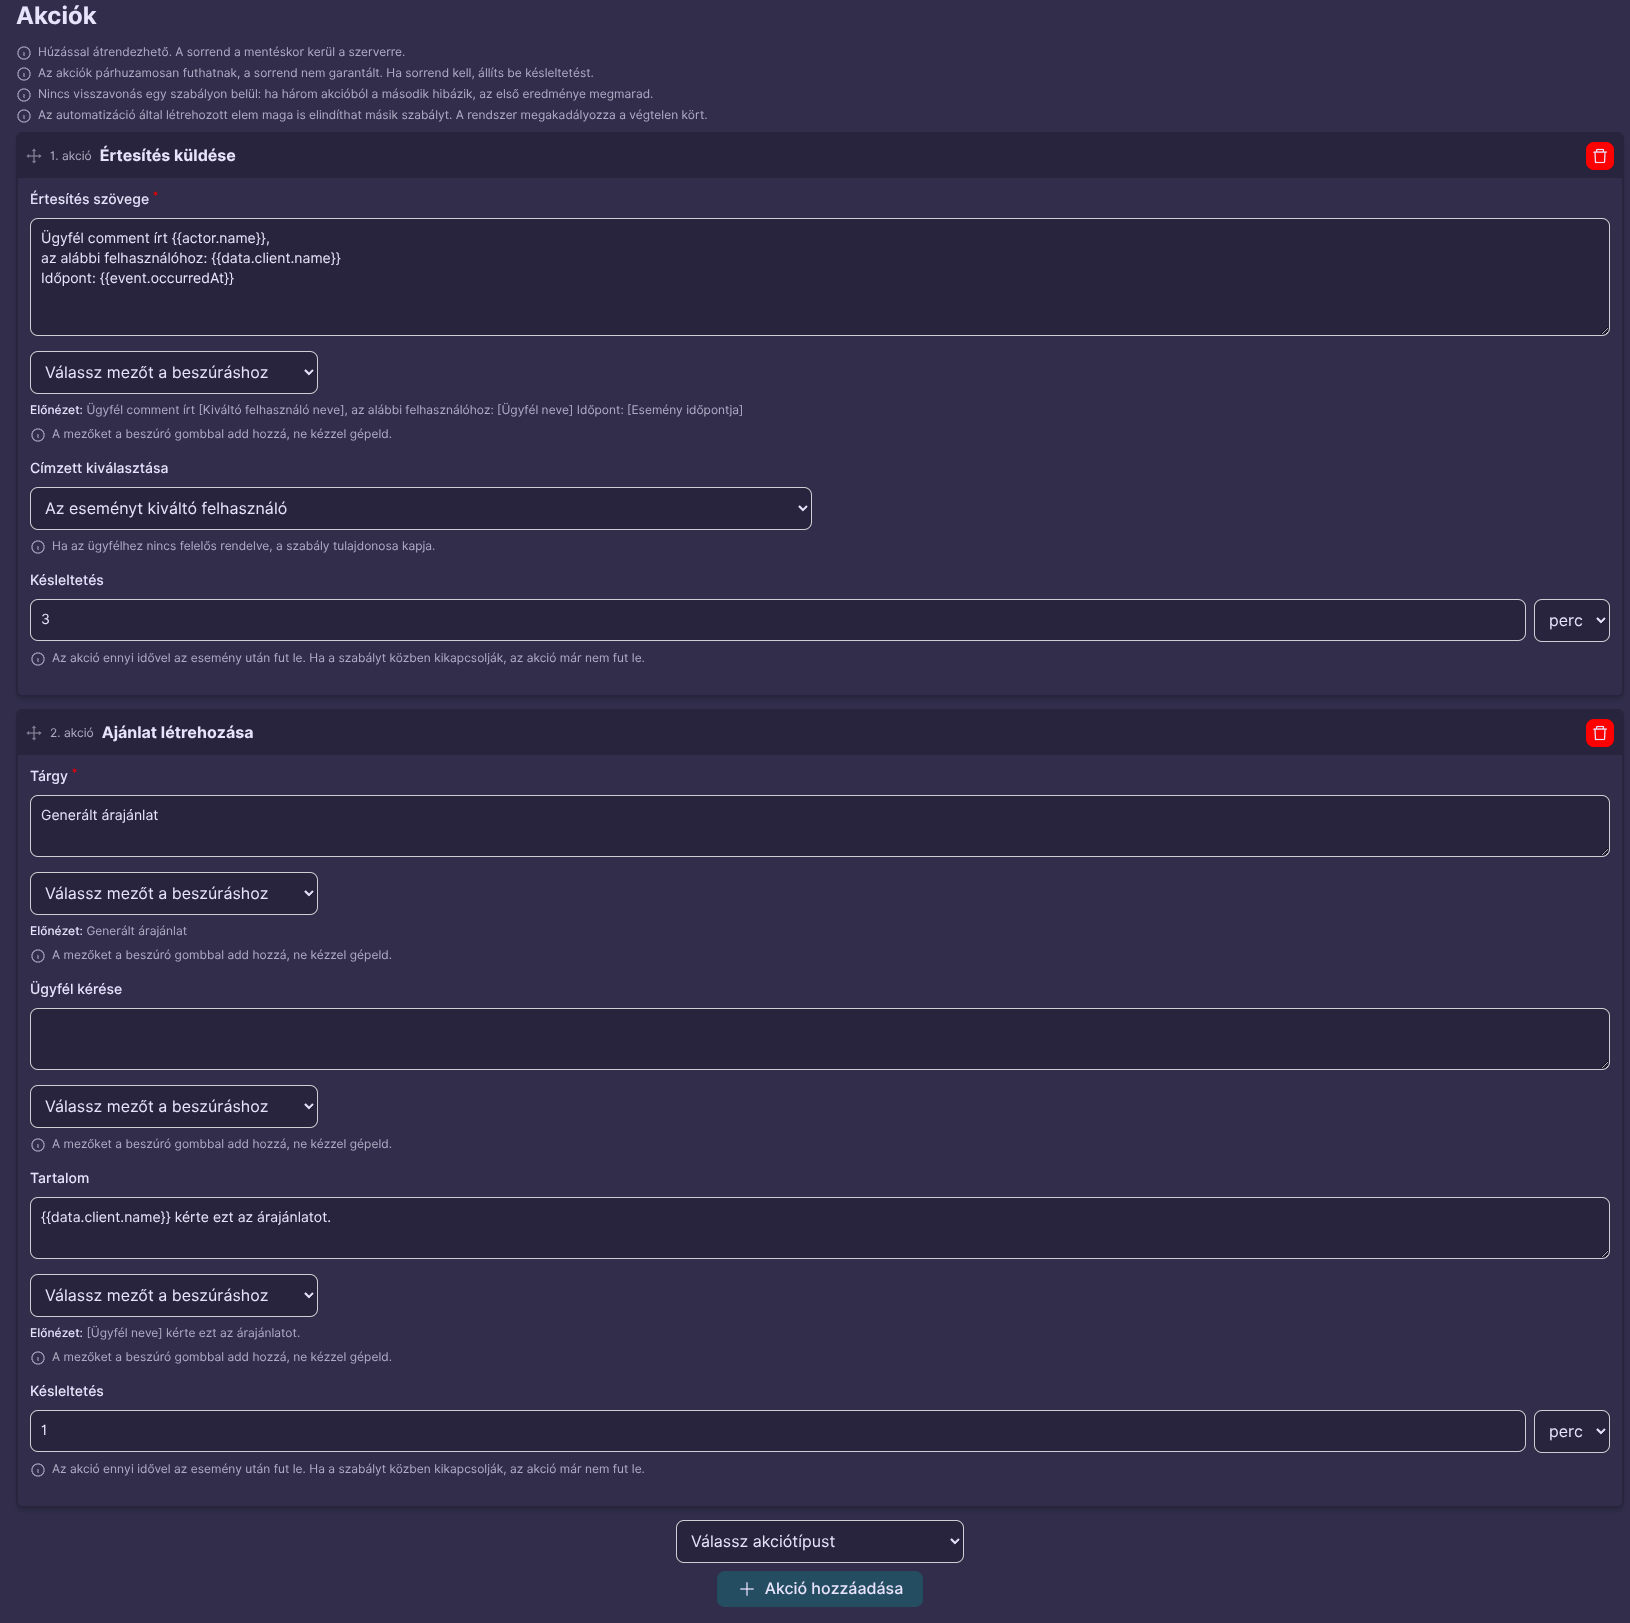
In this block, we add the elements ("actions") that will be created when the specified conditions are met.
We can choose from the following elements, which can be created automatically:
- Checklist
- Calendar event
- Kanban card
- Send notification
- Order
- Quote
- Task
For each element, we can provide the information required for its creation. For example, for a calendar event, we can specify when it starts, when it ends, who should be invited, whether we want to associate the event with the client, etc. In the case of a quote, as shown in the image, we can specify the subject of the quote and the client's request (if applicable to the given situation, but this field can also be left empty).
For each entity to be created, we can insert certain dynamic values, such as the event date and time, the name of the user who triggered the event (e.g. who added a note to the client), the client's name (which client the note was added to — this is particularly useful when the client is not specified among the conditions), etc. The list is quite long, so we will not list all of them here.
Regardless of which entity we create, we can configure a delay. If we do not specify any value (i.e. 0 is entered in the input field), the entity will be created immediately.
Once we are finished, click the save button to return to the list page. There, click the "Active" toggle in the row of the newly created entry.
Logging
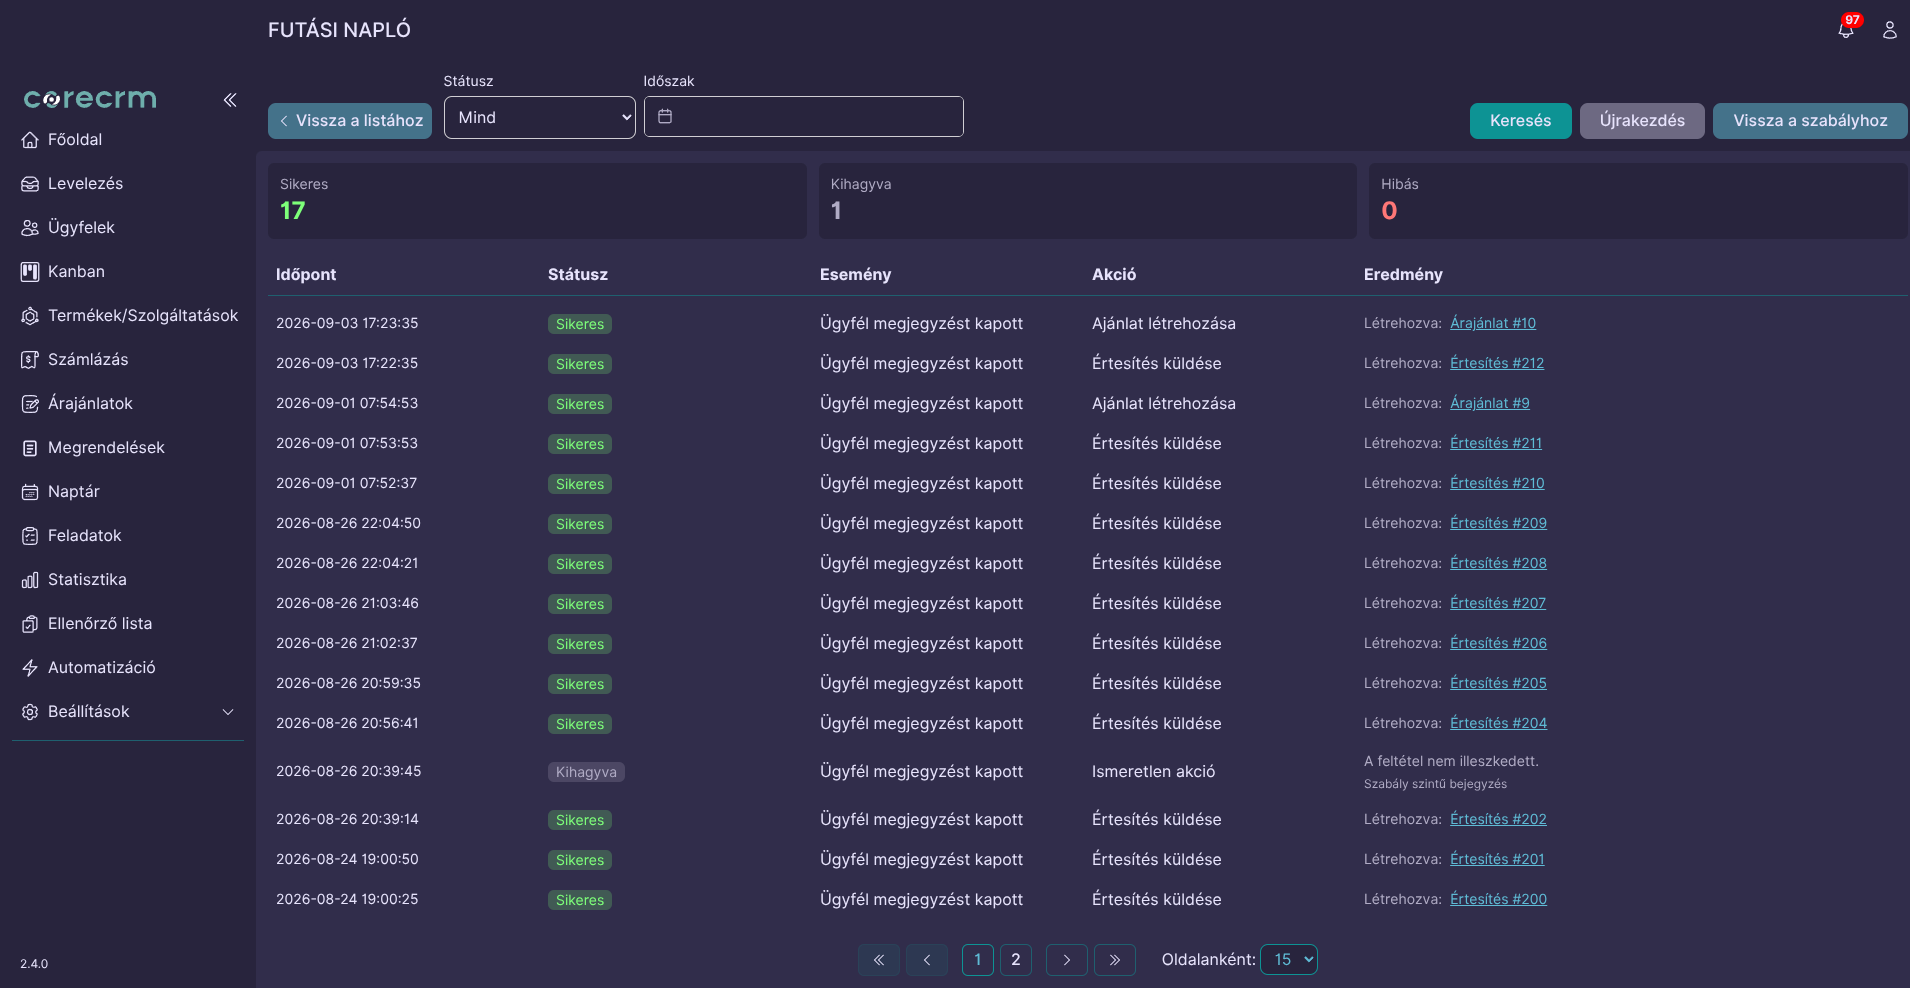
If multiple automations are running in the system, it is possible that we may no longer remember when or why, for example, a quote was created. To prevent these issues, we have created a page where we can review when and what a particular automation created.