Users
Only users with the appropriate permissions can add new users.
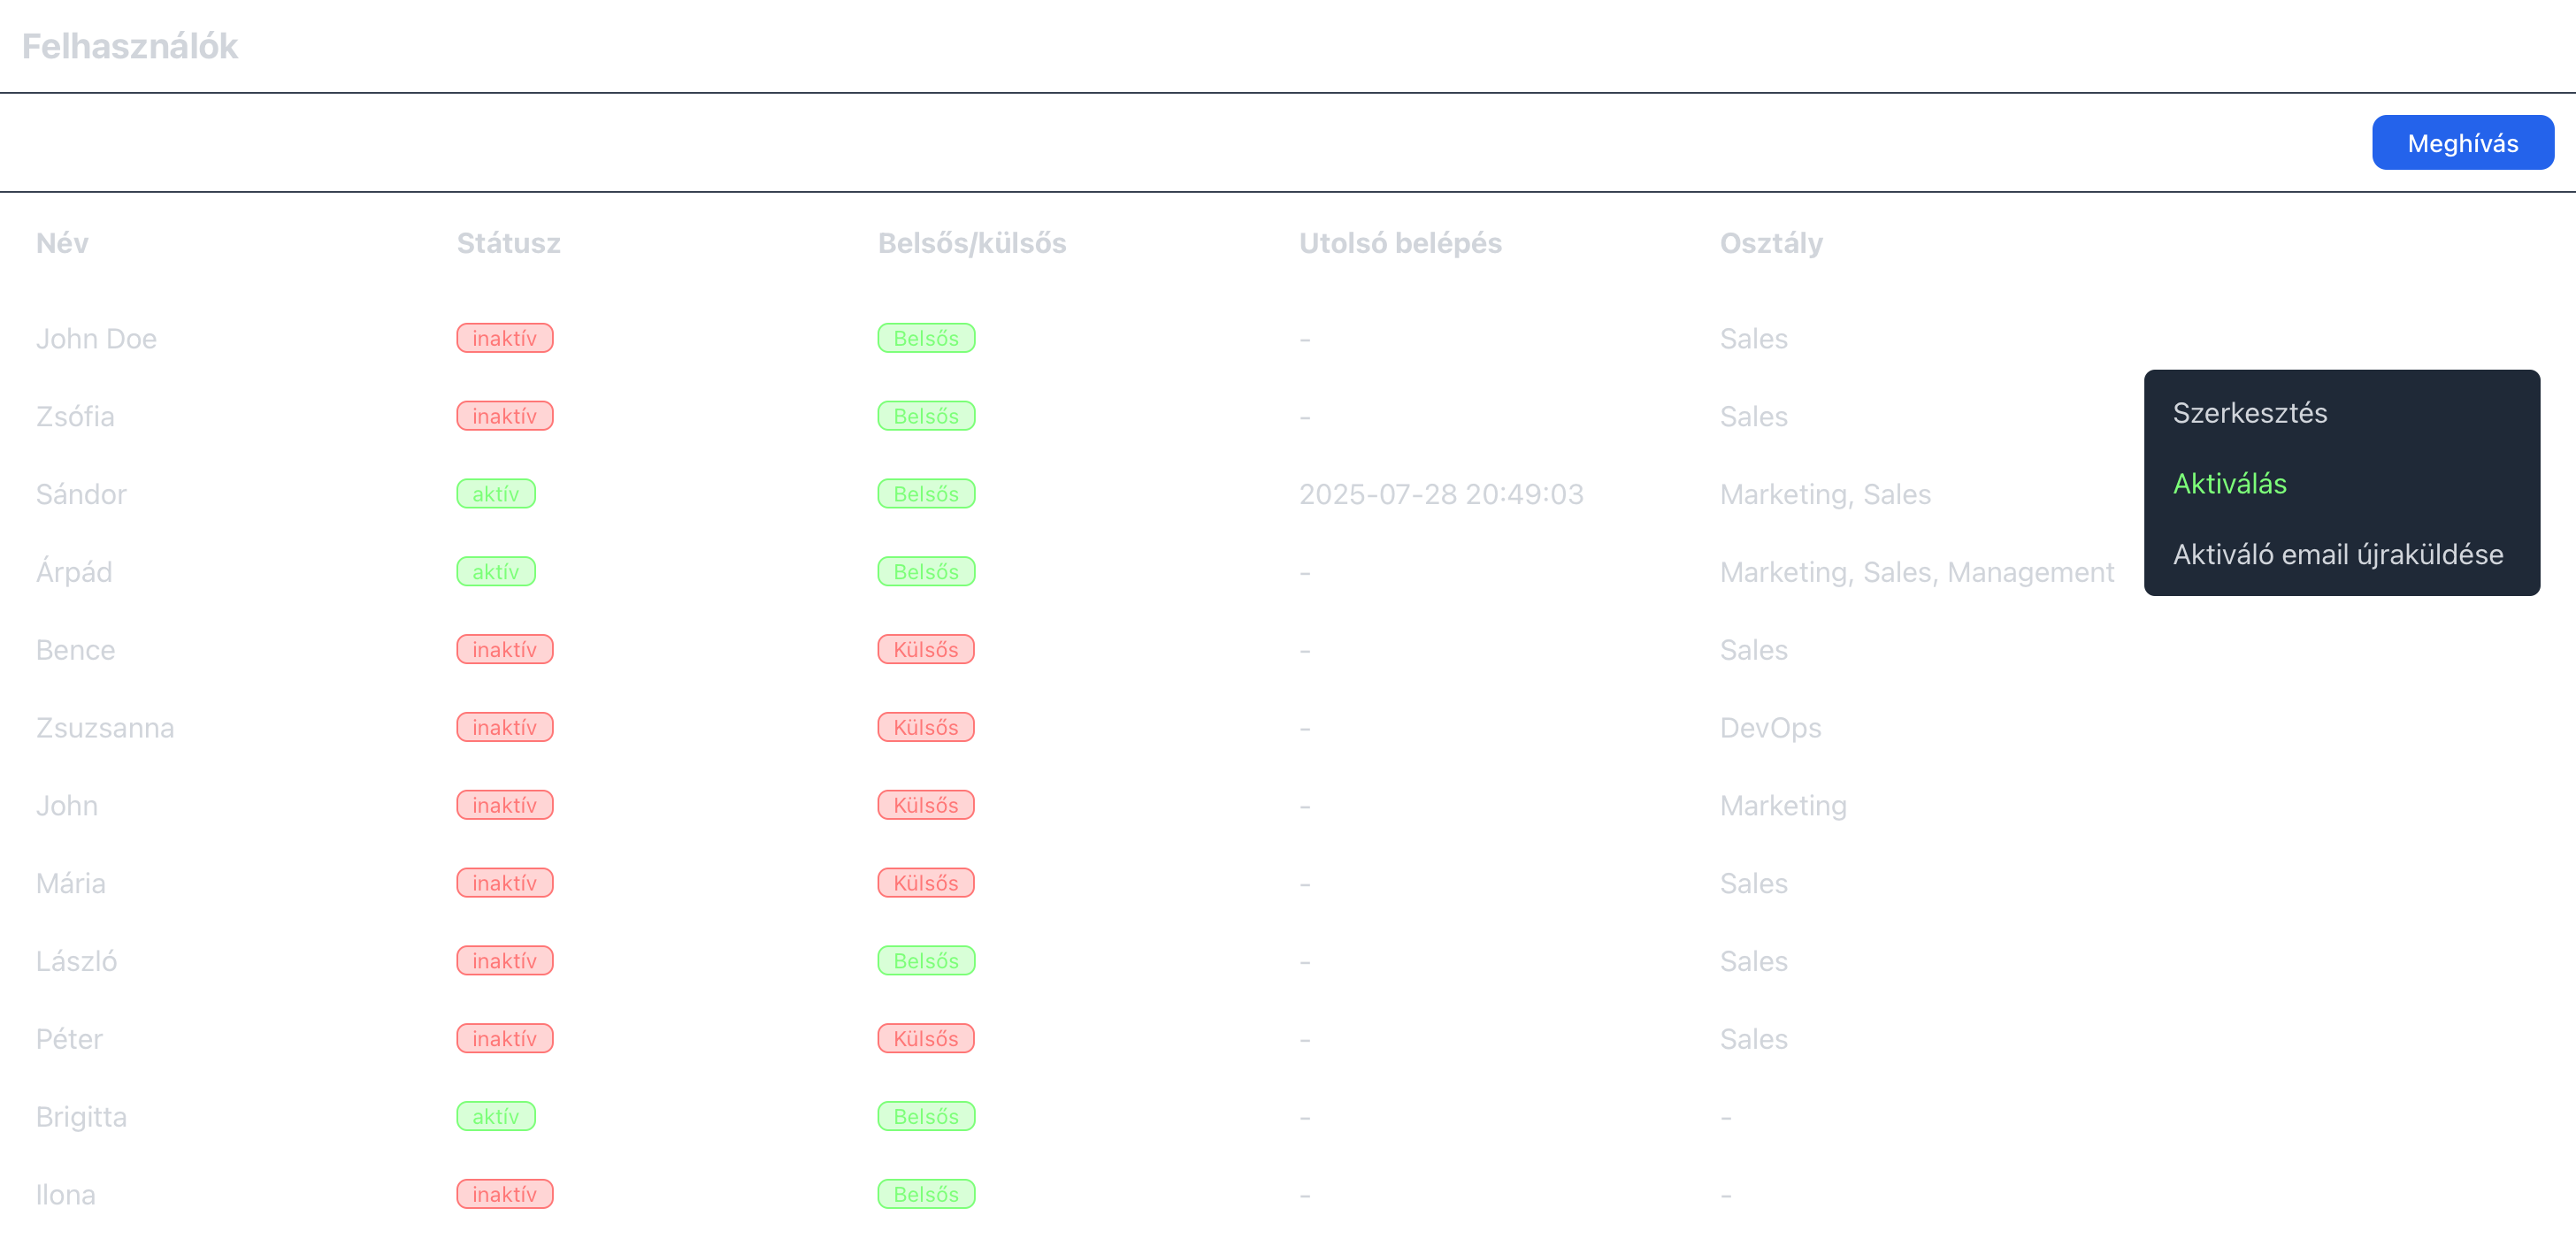
The image above shows the list you’ll see when opening this menu.
Here, you can view key information about each user — for example:
when they last logged in, which department they belong to, whether they are a subcontractor, and whether their account is active or not.
At the end of each row, there is a menu button (three vertical dots).
Clicking it opens several options:
you can edit the user (described in more detail here),
activate or deactivate their account,
and if needed, resend the activation email.
To invite a new person, click the “Invite” button in the top-right corner.
Invitation
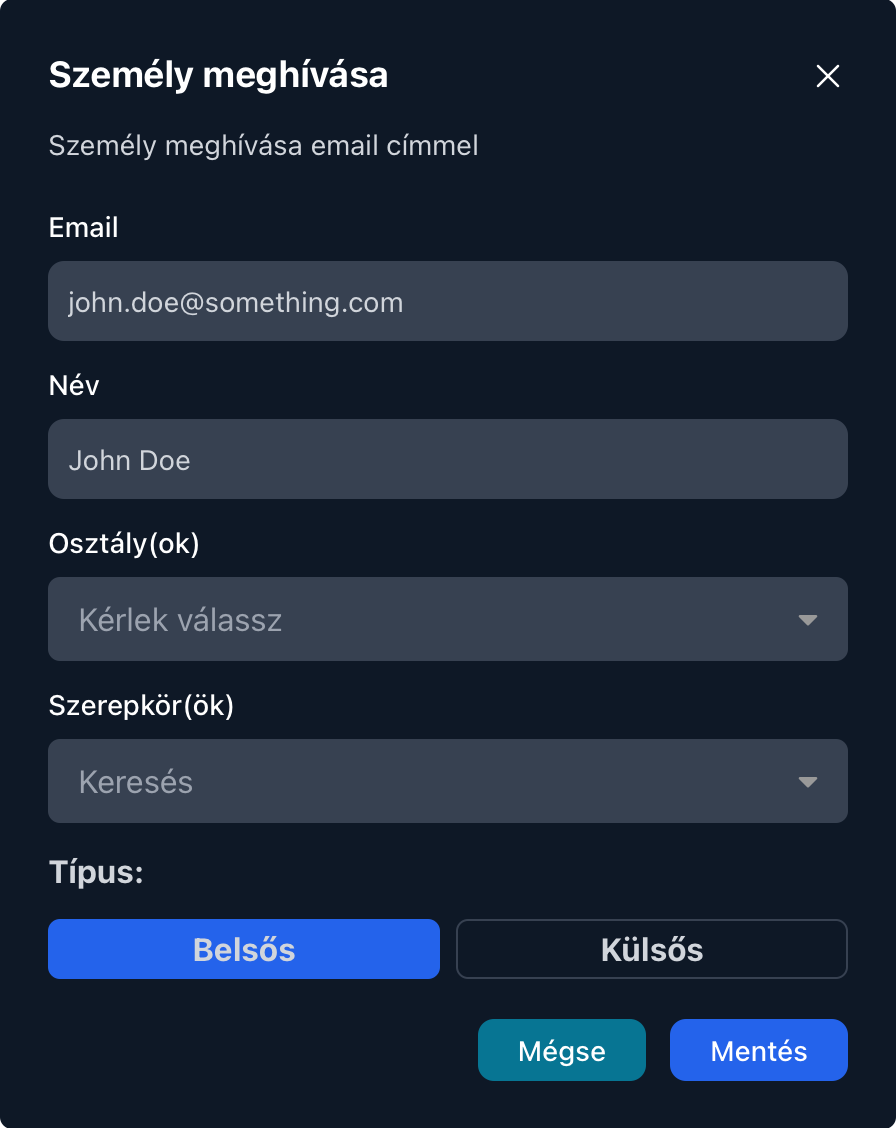
Inviting a new person doesn’t require much information — only their email address (which they’ll use to log in) and name are mandatory.
All other fields are optional and can be filled in later.
Departments and roles have already been discussed here, so we won’t go into those again.
If the person you’re inviting works for a subcontractor, you can mark them as an external worker by changing the Type field (shown at the bottom of the image) to “External.”
When you do this, a new input field called “Employer” appears, where you can select the subcontractor from your list of clients (if already created).
After saving, the user will appear in the list.
Once activated, they will receive an email containing a link to set their password — after doing so, they can log in to the system.